
Pumpkin Bread
Around the holiday season, there are so many wonderful gatherings and so little time to get everything done. This recipe is great for holiday celebrations because it is quick and easy, and it tastes delicious!
In this recipe, you will have the option to add a glaze. It is totally up to you and what you prefer. The glaze adds a bit more sweetness and a bit more flair.
You will notice that I provided both weight and volume measurements for most of these ingredients. I feel that weighing ingredients is better because it is more accurate. However, due to the small quantities of some of these ingredients, it may be easier to measure by volume.
There will be a few tips throughout this recipe, but the main one is to let the loaf cool and the glaze harden completely before continuing on to the next step, which is why the total time is a bit longer. This recipe can easily be doubled or tripled if you want to give these as gifts. Enjoy!

Ingredients
-
240g Canned Pumpkin, fresh or canned (if using frozen, let it thaw completely and drain out excess liquid)
-
5g or 1 tsp Baking Soda
-
2g or ½ tsp Baking Powder
-
100g Light Brown Sugar
-
150g Granulated Sugar
-
10g or 2 tsp Pure Vanilla Extract (see note)
-
155g - 160g or 3 Large Eggs, room temperature
-
60g Extra Virgin Olive Oil
-
200g GF All Purpose Flour (see note)
-
5g or 2 tsp Ground Cinnamon
-
4g or 1 ½ tsp Ground Ginger
-
2g or ¾ tsp Ground Nutmeg
-
¼ tsp Ground Cloves
-
⅛ tsp Ground Allspice
-
1g or ¼ tsp Fine Salt
-
75g Mix-ins (chocolate chips, nuts, candied ginger, etc.): Optional
Glaze: Optional
-
170g Powdered Sugar
-
26g Water or 30g Non-Dairy Milk
-
4g or 1 tsp Pure Vanilla Extract (see note)
-
⅛ tsp Fine Salt
-
10g Candied Ginger, diced small
Start Mixing
-
Preheat the oven to 350°F and spray a 9x5 loaf baking pan with pan spray. Make sure the spray is GF, because some have flour in them!
-
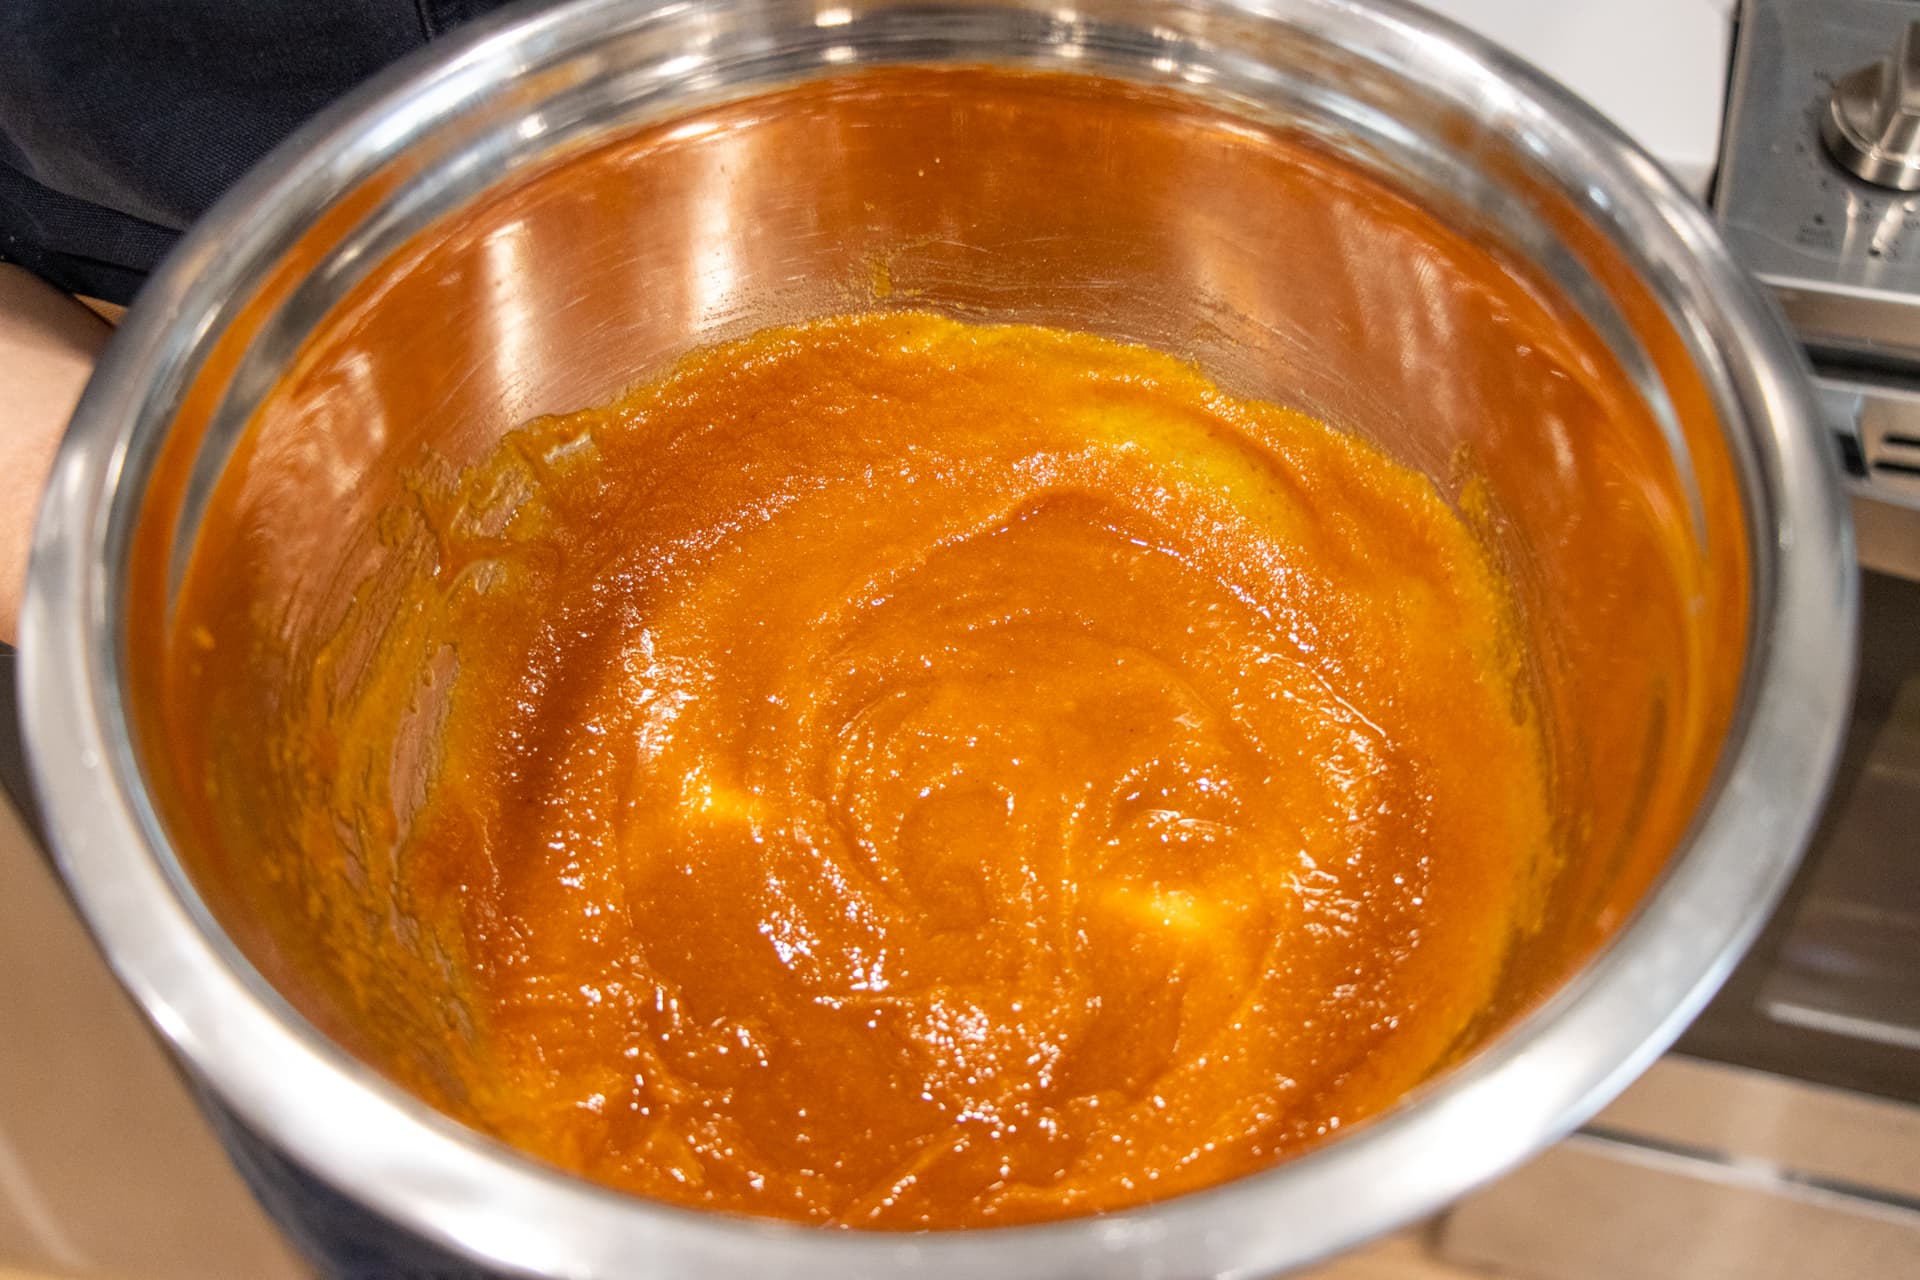
In a medium-sized mixing bowl, combine the pumpkin puree, baking soda, and baking powder, and whisk together until combined, about 15-20 seconds.
-
Add the light brown sugar, sugar, and vanilla extract to the pumpkin mixture and whisk until all the sugars have incorporated, about 30 seconds.
Add the Eggs and Oil
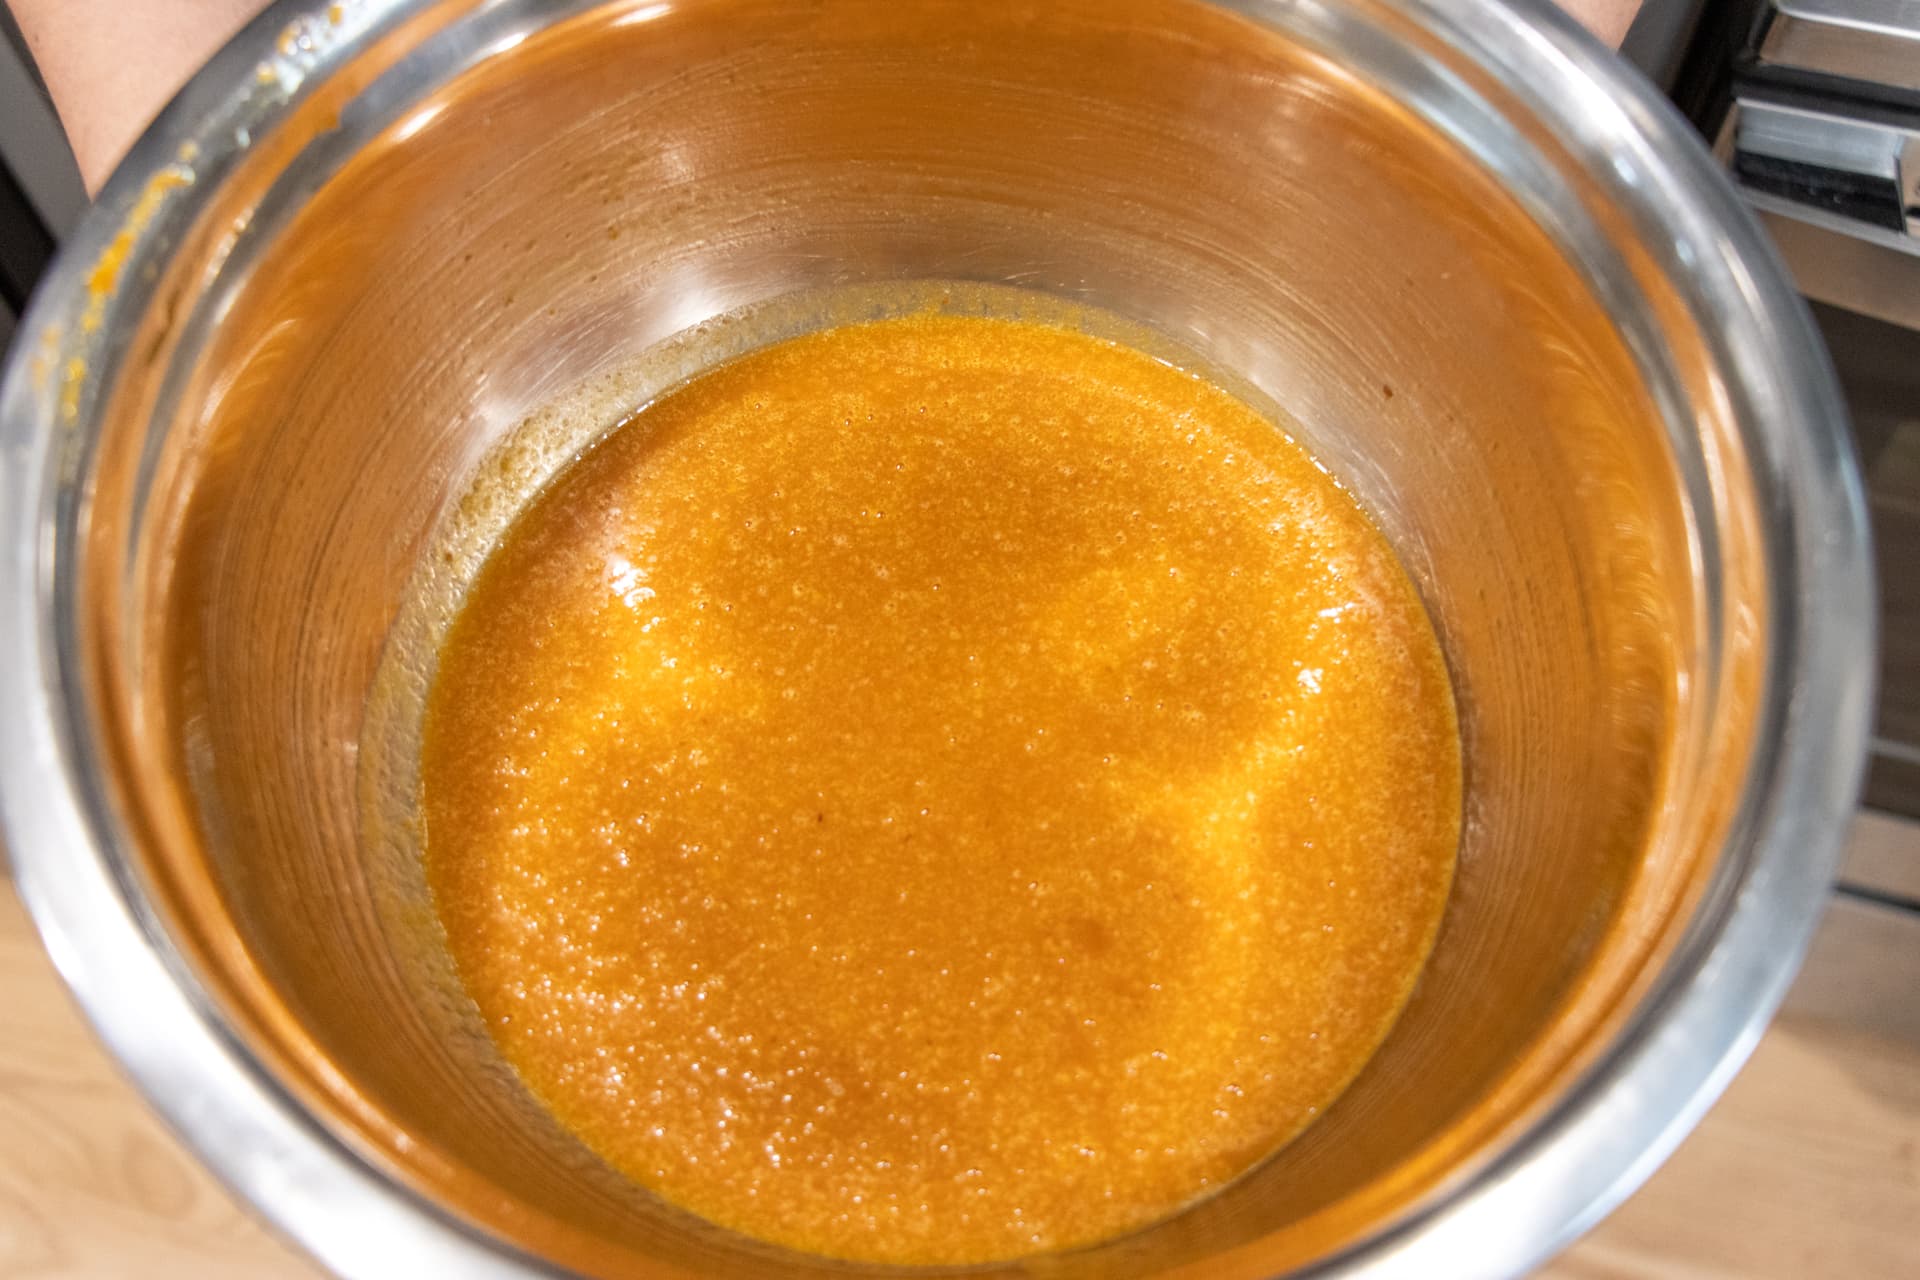
- Whisk in the eggs and olive oil until the eggs are fully incorporated and the batter is smooth, about 30-45 seconds.
Tip: If you forget to take your eggs out early (which I do often), you can warm them up by putting them in a bowl with room temperature water for about 15 minutes.
Tip: I like to use Extra Virgin Olive Oil in recipes because I feel that it is a healthy oil option and I personally don't mind the flavor of it in baked goods. You are welcome to swap this out with another neutral-flavored oil (such as canola, safflower, sunflower, etc.). I have not tried this recipe with coconut oil, but let me know if you try it! Just make sure it is melted.
Add the Dry Ingredients
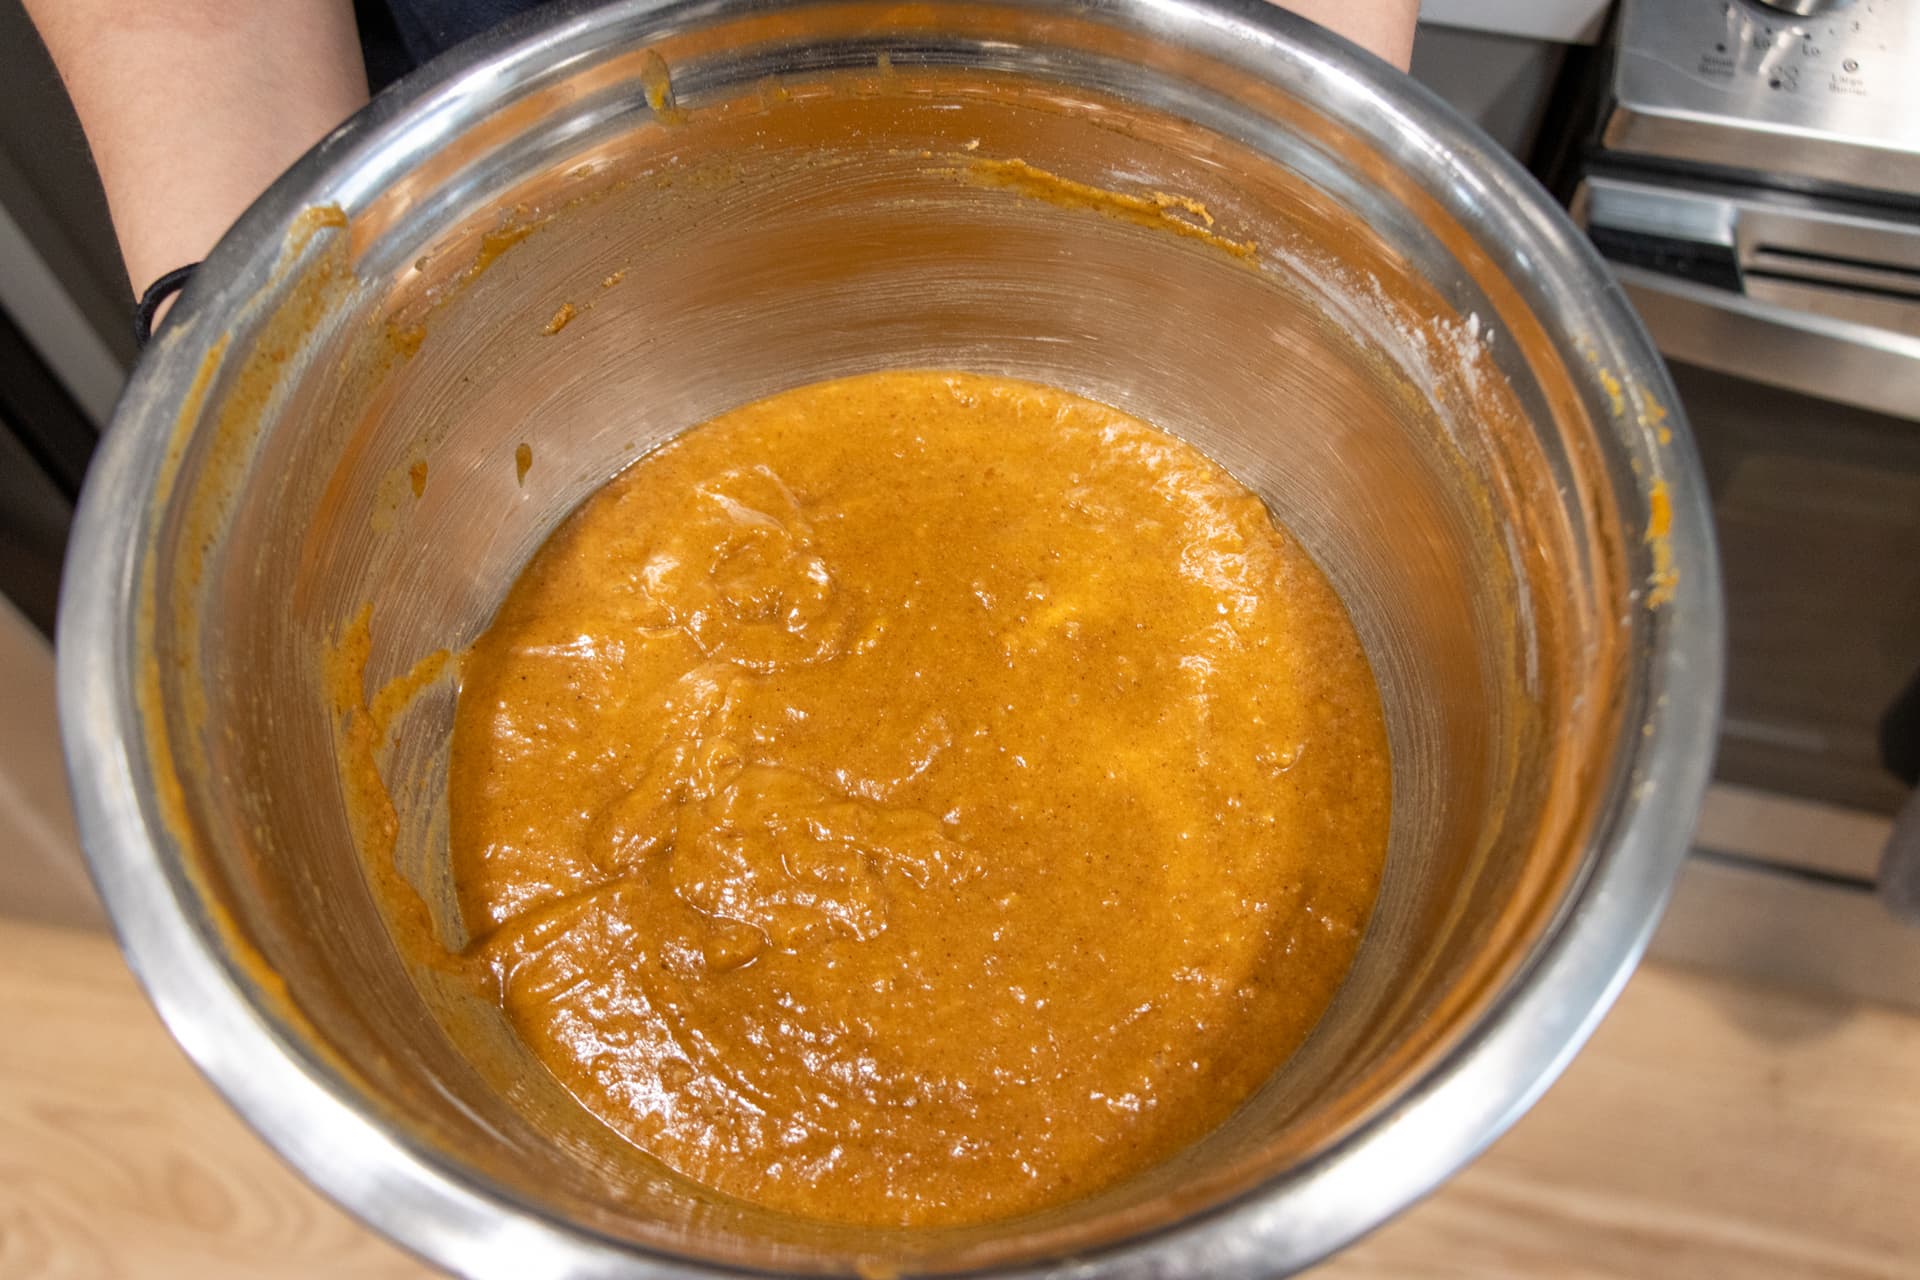
- Sift together the flour, cinnamon, ginger, nutmeg, cloves, allspice, and salt in a separate bowl or directly into the batter. Add the dry ingredients into the batter (if you haven't done so already), switch to a spatula, and mix for 45 seconds to 1 minute. Almost all of the dry ingredients should be gone, but there should be a few left if you are choosing to add a mix-in. If not, mix the batter for another 5-10 seconds until the dry bits are gone, like the photo. I did not add mix-ins to this batch.
Mix-ins optional: Chocolate chips or nuts are always classic, but I like the addition of diced candied ginger. If you choose to add nuts, always toast your nuts! It brings out the natural oils and amplifies the flavor of the nuts. Fold the mix-ins into the batter until evenly distributed, about 10-15 seconds
Pour Batter and Bake!
-
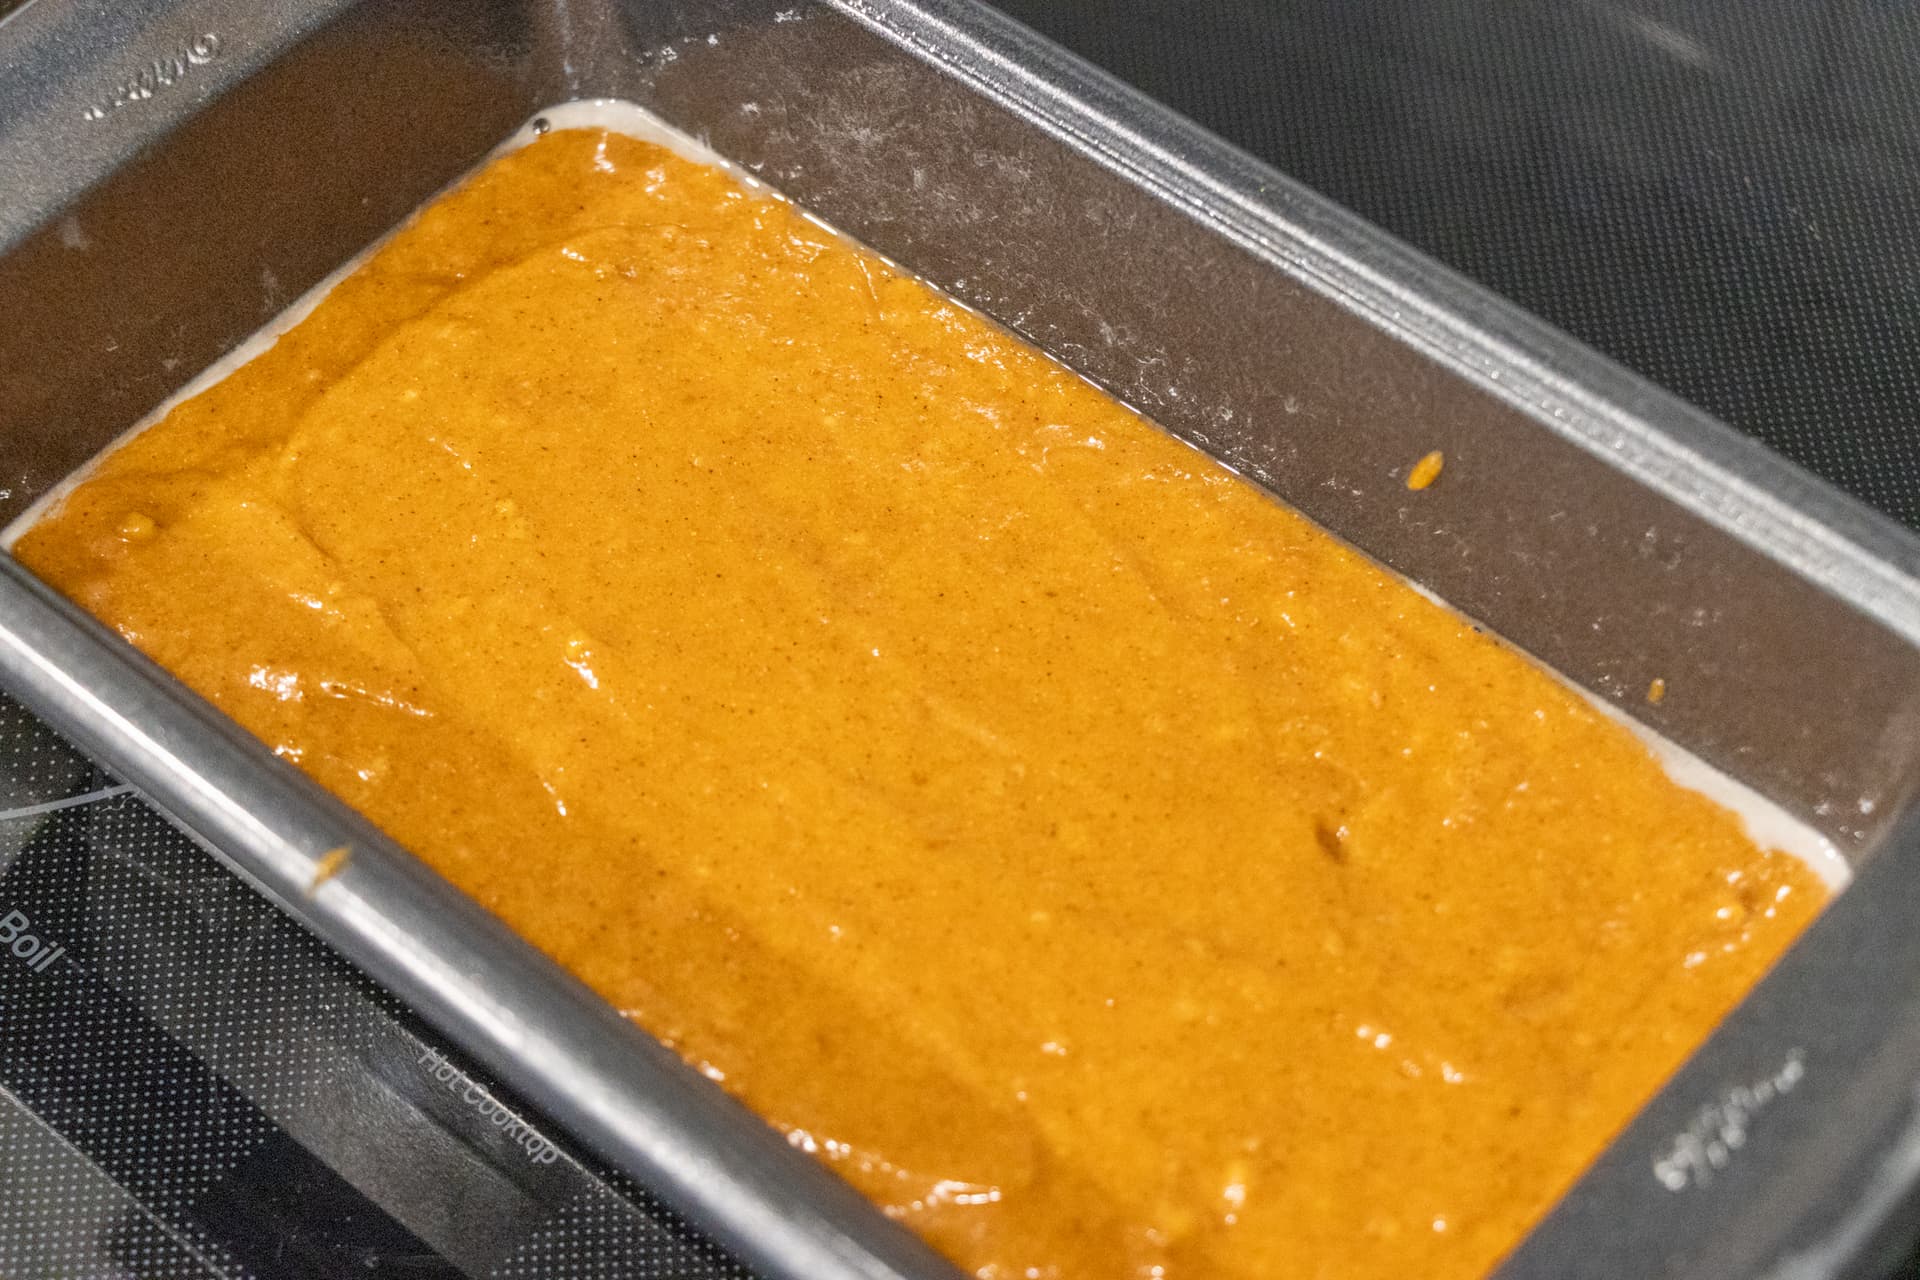
Pour the batter into the prepared baking pan (make sure to scrape the bowl) and smooth out the top with a spatula.
-
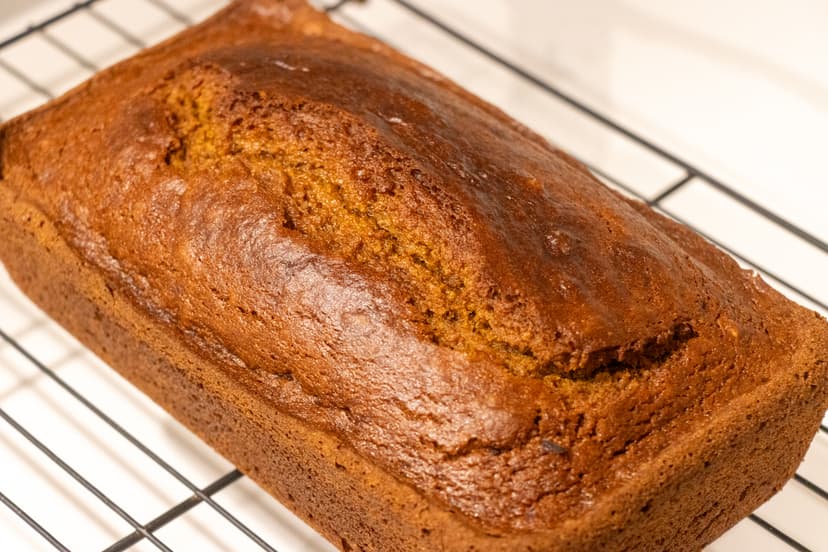
Bake for 50-60 minutes, rotating the pan after 35 minutes of baking time. Once the loaf has been baking for 50 minutes, I would recommend checking if it is done by inserting a toothpick into the center. If it is clean when it comes out, the bread is ready! These moist breads can be a little tricky, so if you are at all unsure about the doneness of your loaf, I recommend baking for another 3-5 minutes.
Tip: If you have chocolate chips in your loaf, I would recommend checking the doneness of your loaf in a couple places, as the chocolate chips can interfere with the doneness check.

Cool and Slice (if not glazing)
-
When the loaf is done, take it out of the oven and let it cool in the pan for 10 minutes. Then, turn it out onto a cooling rack and let it cool for about 2 hours.
-
Once it is fully cooled and you have chosen not to put glaze on it, you are done! I would recommend cutting the loaf and keeping it in an airtight container for 4 days on the counter. The fridge is great for preserving things, but it will dry out your baked goods pretty quickly. If you do not think you will finish the loaf in time, you can put it in the freezer for up to 2 months. I prefer to slice this loaf into 16 pieces, for relatively thin slices. The bread holds up pretty well and gives you more slices to share! If you prefer thicker slices, you can slice into 12 slices.

Make the Glaze
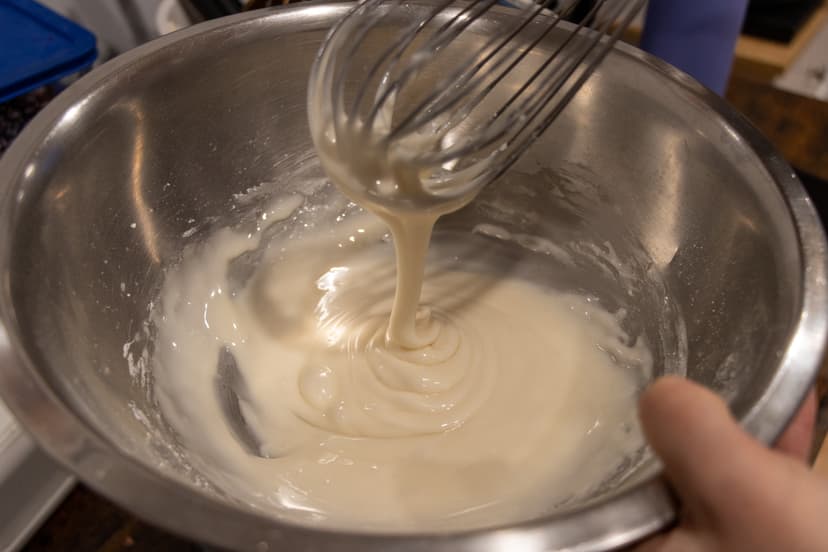
- Combine all icing ingredients in a bowl and whisk until smooth. It will appear pretty thick, but still pourable. A thick icing works best for this recipe because it sticks better to the top and makes more dramatic drips on the sides of the loaf. If you prefer thinner glaze, you can add more liquid but it may run off the loaf.
Tip: Don't skip the cooling! It is important that this loaf is cool before glazing. Otherwise, the glaze will run right off or absorb into the loaf.
Optional: For a little extra holiday flair, I will add 15g Oat Milk and 15g Dairy-free Egg Nog for additional flavor without making the glaze too thick.

It's Time to Glaze!
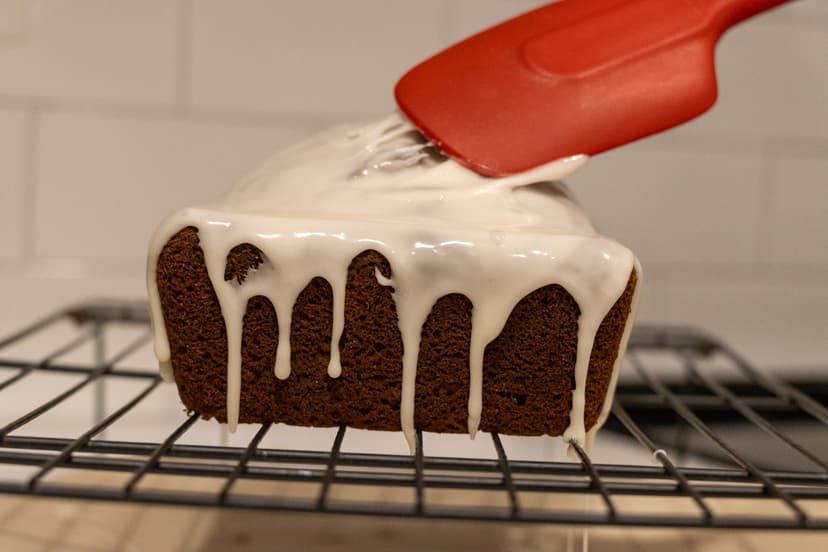
- Drizzle the glaze over the top of the loaf with the whisk and spread it around with a spatula, keeping in mind that the glaze will likely pool in the middle because of the crack in the top. You will want to make sure there is glaze covering the entire top of the loaf. If you have extra glaze, you can add some extra glaze to the edges and encourage some drips on the side with your spatula.
Tip: Set up a glazing station with a piece of parchment under your cooling rack. The glaze may run off the loaf and setting this up makes cleanup easy!

Add Toppings: Optional
-
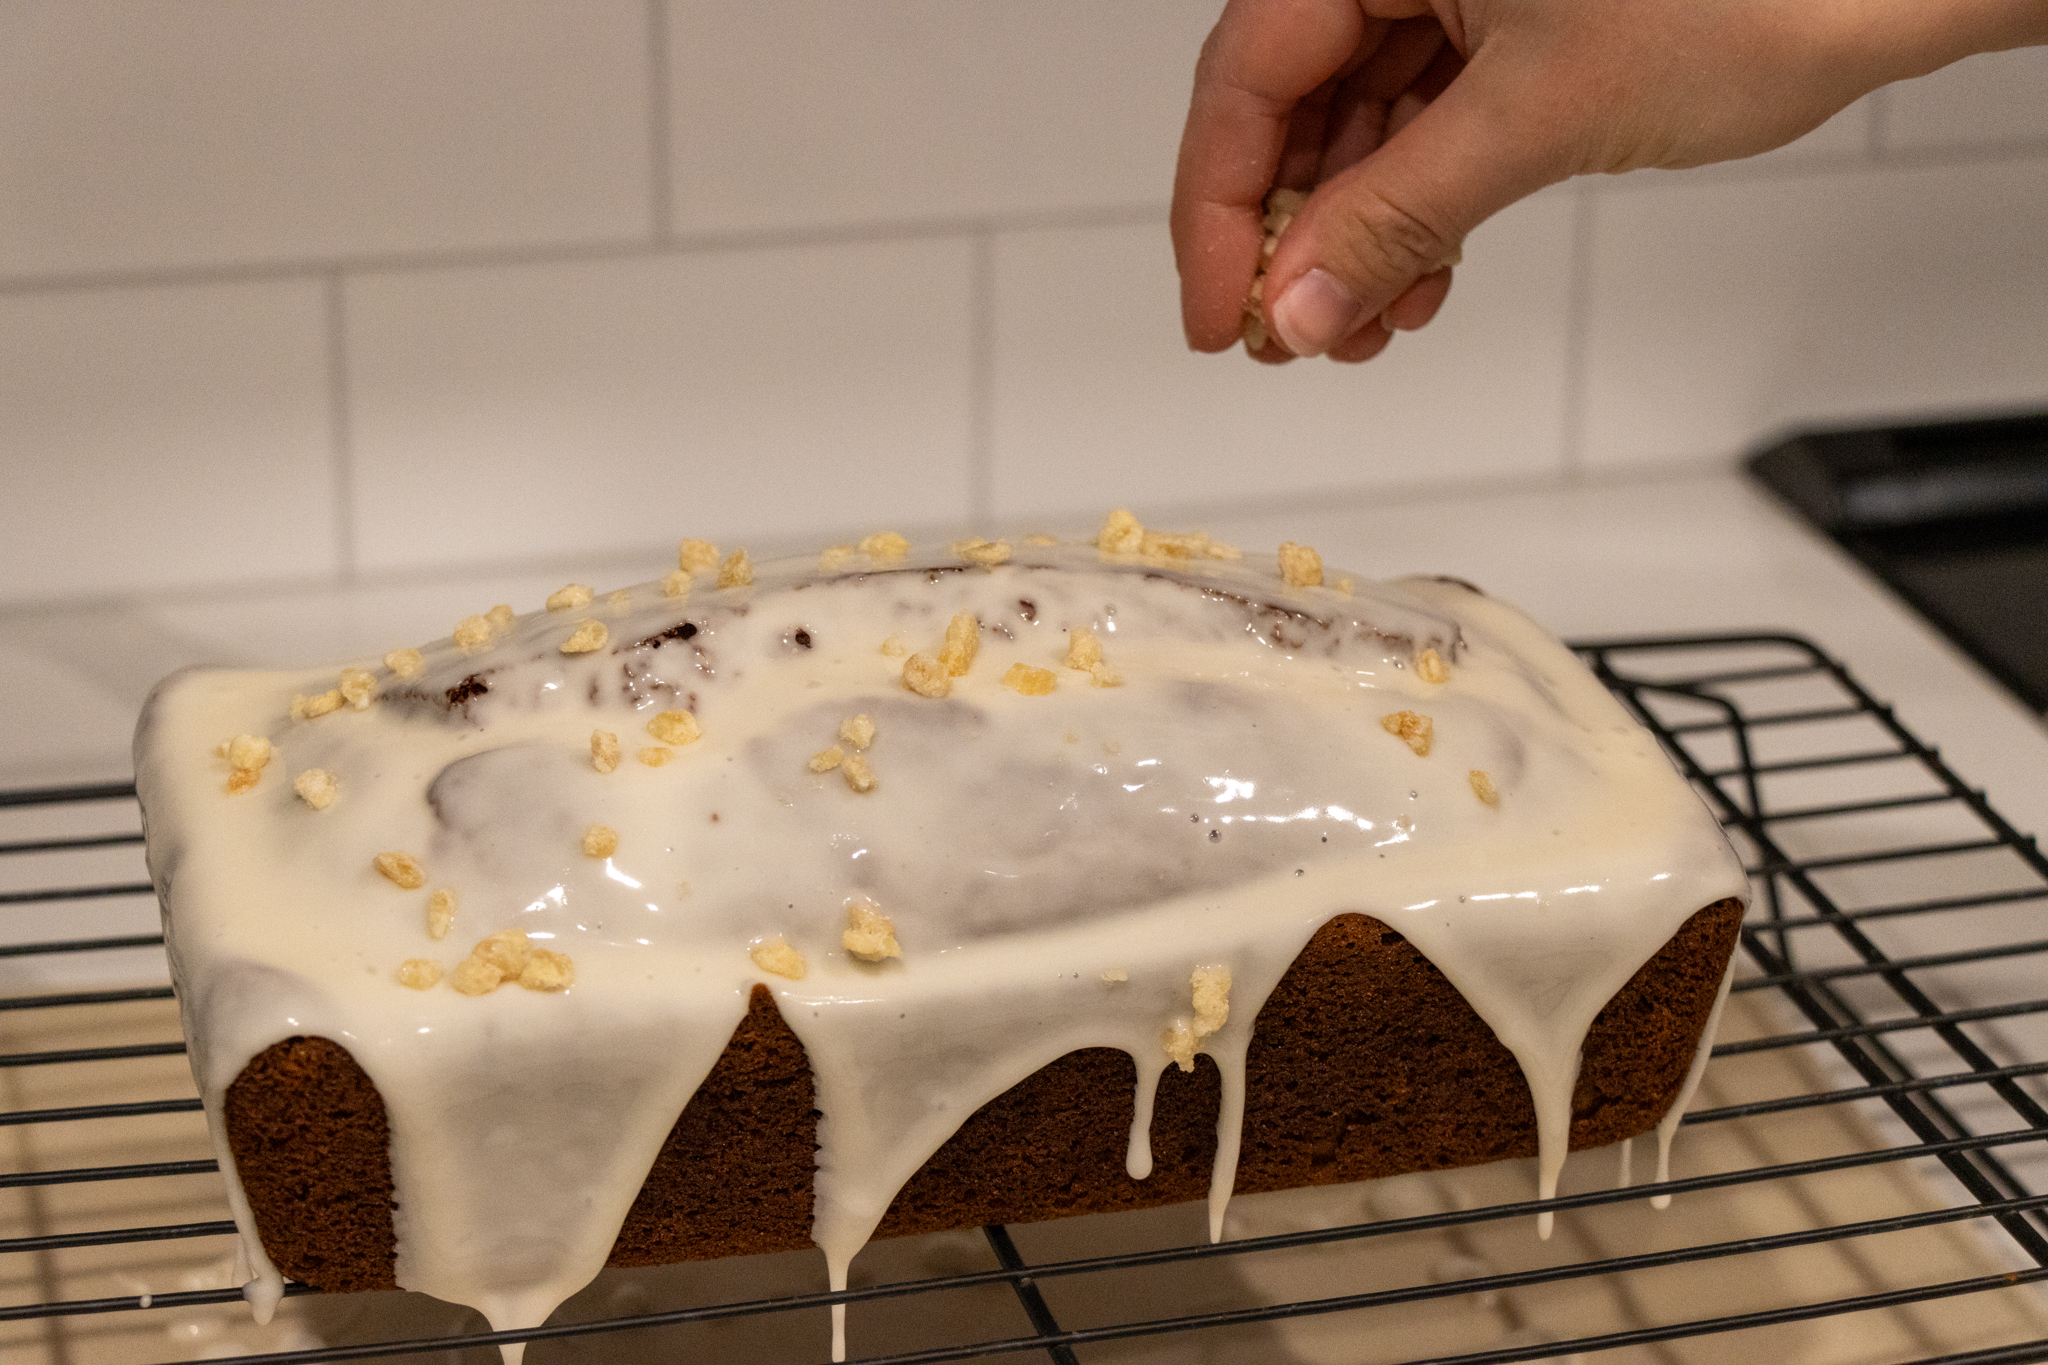
If you want, you can also top the freshly iced loaf with chopped candied ginger, chocolate chips, or chopped nuts. Make sure to add it while the glaze is still wet so it sticks. Let the glaze harden on the loaf before cutting for the cleanest cuts! This will usually take about 1 hour. If you can leave it longer, that is even better.
-
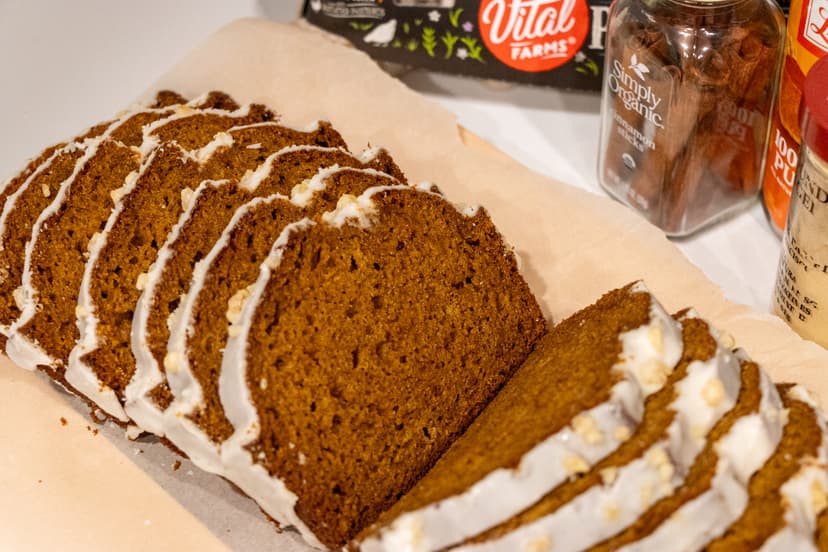
Similar storage instructions as above, but I would not recommend freezing it. The glaze will start to not look as clean and crisp, and the freezer may make it soggy when thawed. I love to make this recipe with the glaze for an event as a beautiful centerpiece. I would recommend consumption of this glazed loaf within 3 days. Slice and enjoy!
Pumpkin Bread
Around the holiday season, there are so many wonderful gatherings and so little time to get everything done. This recipe is great for holiday celebrations because it is quick and easy, and it tastes delicious!
In this recipe, you will have the option to add a glaze. It is totally up to you and what you prefer. The glaze adds a bit more sweetness and a bit more flair.
You will notice that I provided both weight and volume measurements for most of these ingredients. I feel that weighing ingredients is better because it is more accurate. However, due to the small quantities of some of these ingredients, it may be easier to measure by volume.
There will be a few tips throughout this recipe, but the main one is to let the loaf cool and the glaze harden completely before continuing on to the next step, which is why the total time is a bit longer. This recipe can easily be doubled or tripled if you want to give these as gifts. Enjoy!
Ingredients
-
240g Canned Pumpkin, fresh or canned (if using frozen, let it thaw completely and drain out excess liquid)
-
5g or 1 tsp Baking Soda
-
2g or ½ tsp Baking Powder
-
100g Light Brown Sugar
-
150g Granulated Sugar
-
10g or 2 tsp Pure Vanilla Extract (see note)
-
155g - 160g or 3 Large Eggs, room temperature
-
60g Extra Virgin Olive Oil
-
200g GF All Purpose Flour (see note)
-
5g or 2 tsp Ground Cinnamon
-
4g or 1 ½ tsp Ground Ginger
-
2g or ¾ tsp Ground Nutmeg
-
¼ tsp Ground Cloves
-
⅛ tsp Ground Allspice
-
1g or ¼ tsp Fine Salt
-
75g Mix-ins (chocolate chips, nuts, candied ginger, etc.): Optional
Glaze: Optional
-
170g Powdered Sugar
-
26g Water or 30g Non-Dairy Milk
-
4g or 1 tsp Pure Vanilla Extract (see note)
-
⅛ tsp Fine Salt
-
10g Candied Ginger, diced small

Start Mixing
-
Preheat the oven to 350°F and spray a 9x5 loaf baking pan with pan spray. Make sure the spray is GF, because some have flour in them!
-
In a medium-sized mixing bowl, combine the pumpkin puree, baking soda, and baking powder, and whisk together until combined, about 15-20 seconds.
-
Add the light brown sugar, sugar, and vanilla extract to the pumpkin mixture and whisk until all the sugars have incorporated, about 30 seconds.

Add the Eggs and Oil
- Whisk in the eggs and olive oil until the eggs are fully incorporated and the batter is smooth, about 30-45 seconds.
Tip: If you forget to take your eggs out early (which I do often), you can warm them up by putting them in a bowl with room temperature water for about 15 minutes.
Tip: I like to use Extra Virgin Olive Oil in recipes because I feel that it is a healthy oil option and I personally don't mind the flavor of it in baked goods. You are welcome to swap this out with another neutral-flavored oil (such as canola, safflower, sunflower, etc.). I have not tried this recipe with coconut oil, but let me know if you try it! Just make sure it is melted.

Add the Dry Ingredients
- Sift together the flour, cinnamon, ginger, nutmeg, cloves, allspice, and salt in a separate bowl or directly into the batter. Add the dry ingredients into the batter (if you haven't done so already), switch to a spatula, and mix for 45 seconds to 1 minute. Almost all of the dry ingredients should be gone, but there should be a few left if you are choosing to add a mix-in. If not, mix the batter for another 5-10 seconds until the dry bits are gone, like the photo. I did not add mix-ins to this batch.
Mix-ins optional: Chocolate chips or nuts are always classic, but I like the addition of diced candied ginger. If you choose to add nuts, always toast your nuts! It brings out the natural oils and amplifies the flavor of the nuts. Fold the mix-ins into the batter until evenly distributed, about 10-15 seconds

Pour Batter and Bake!
-
Pour the batter into the prepared baking pan (make sure to scrape the bowl) and smooth out the top with a spatula.
-
Bake for 50-60 minutes, rotating the pan after 35 minutes of baking time. Once the loaf has been baking for 50 minutes, I would recommend checking if it is done by inserting a toothpick into the center. If it is clean when it comes out, the bread is ready! These moist breads can be a little tricky, so if you are at all unsure about the doneness of your loaf, I recommend baking for another 3-5 minutes.
Tip: If you have chocolate chips in your loaf, I would recommend checking the doneness of your loaf in a couple places, as the chocolate chips can interfere with the doneness check.

Cool and Slice (if not glazing)
-
When the loaf is done, take it out of the oven and let it cool in the pan for 10 minutes. Then, turn it out onto a cooling rack and let it cool for about 2 hours.
-
Once it is fully cooled and you have chosen not to put glaze on it, you are done! I would recommend cutting the loaf and keeping it in an airtight container for 4 days on the counter. The fridge is great for preserving things, but it will dry out your baked goods pretty quickly. If you do not think you will finish the loaf in time, you can put it in the freezer for up to 2 months. I prefer to slice this loaf into 16 pieces, for relatively thin slices. The bread holds up pretty well and gives you more slices to share! If you prefer thicker slices, you can slice into 12 slices.
Make the Glaze
- Combine all icing ingredients in a bowl and whisk until smooth. It will appear pretty thick, but still pourable. A thick icing works best for this recipe because it sticks better to the top and makes more dramatic drips on the sides of the loaf. If you prefer thinner glaze, you can add more liquid but it may run off the loaf.
Tip: Don't skip the cooling! It is important that this loaf is cool before glazing. Otherwise, the glaze will run right off or absorb into the loaf.
Optional: For a little extra holiday flair, I will add 15g Oat Milk and 15g Dairy-free Egg Nog for additional flavor without making the glaze too thick.
It's Time to Glaze!
- Drizzle the glaze over the top of the loaf with the whisk and spread it around with a spatula, keeping in mind that the glaze will likely pool in the middle because of the crack in the top. You will want to make sure there is glaze covering the entire top of the loaf. If you have extra glaze, you can add some extra glaze to the edges and encourage some drips on the side with your spatula.
Tip: Set up a glazing station with a piece of parchment under your cooling rack. The glaze may run off the loaf and setting this up makes cleanup easy!
Add Toppings: Optional
-
If you want, you can also top the freshly iced loaf with chopped candied ginger, chocolate chips, or chopped nuts. Make sure to add it while the glaze is still wet so it sticks. Let the glaze harden on the loaf before cutting for the cleanest cuts! This will usually take about 1 hour. If you can leave it longer, that is even better.
-
Similar storage instructions as above, but I would not recommend freezing it. The glaze will start to not look as clean and crisp, and the freezer may make it soggy when thawed. I love to make this recipe with the glaze for an event as a beautiful centerpiece. I would recommend consumption of this glazed loaf within 3 days. Slice and enjoy!

Pumpkin Bread

Around the holiday season, there are so many wonderful gatherings and so little time to get everything done. This recipe is great for holiday celebrations because it is quick and easy, and it tastes delicious!
In this recipe, you will have the option to add a glaze. It is totally up to you and what you prefer. The glaze adds a bit more sweetness and a bit more flair.
You will notice that I provided both weight and volume measurements for most of these ingredients. I feel that weighing ingredients is better because it is more accurate. However, due to the small quantities of some of these ingredients, it may be easier to measure by volume.
There will be a few tips throughout this recipe, but the main one is to let the loaf cool and the glaze harden completely before continuing on to the next step, which is why the total time is a bit longer. This recipe can easily be doubled or tripled if you want to give these as gifts. Enjoy!
Ingredients

-
240g Canned Pumpkin, fresh or canned (if using frozen, let it thaw completely and drain out excess liquid)
-
5g or 1 tsp Baking Soda
-
2g or ½ tsp Baking Powder
-
100g Light Brown Sugar
-
150g Granulated Sugar
-
10g or 2 tsp Pure Vanilla Extract (see note)
-
155g - 160g or 3 Large Eggs, room temperature
-
60g Extra Virgin Olive Oil
-
200g GF All Purpose Flour (see note)
-
5g or 2 tsp Ground Cinnamon
-
4g or 1 ½ tsp Ground Ginger
-
2g or ¾ tsp Ground Nutmeg
-
¼ tsp Ground Cloves
-
⅛ tsp Ground Allspice
-
1g or ¼ tsp Fine Salt
-
75g Mix-ins (chocolate chips, nuts, candied ginger, etc.): Optional
Glaze: Optional
-
170g Powdered Sugar
-
26g Water or 30g Non-Dairy Milk
-
4g or 1 tsp Pure Vanilla Extract (see note)
-
⅛ tsp Fine Salt
-
10g Candied Ginger, diced small
Start Mixing

-
Preheat the oven to 350°F and spray a 9x5 loaf baking pan with pan spray. Make sure the spray is GF, because some have flour in them!
-
In a medium-sized mixing bowl, combine the pumpkin puree, baking soda, and baking powder, and whisk together until combined, about 15-20 seconds.
-
Add the light brown sugar, sugar, and vanilla extract to the pumpkin mixture and whisk until all the sugars have incorporated, about 30 seconds.
Add the Eggs and Oil

- Whisk in the eggs and olive oil until the eggs are fully incorporated and the batter is smooth, about 30-45 seconds.
Tip: If you forget to take your eggs out early (which I do often), you can warm them up by putting them in a bowl with room temperature water for about 15 minutes.
Tip: I like to use Extra Virgin Olive Oil in recipes because I feel that it is a healthy oil option and I personally don't mind the flavor of it in baked goods. You are welcome to swap this out with another neutral-flavored oil (such as canola, safflower, sunflower, etc.). I have not tried this recipe with coconut oil, but let me know if you try it! Just make sure it is melted.
Add the Dry Ingredients

- Sift together the flour, cinnamon, ginger, nutmeg, cloves, allspice, and salt in a separate bowl or directly into the batter. Add the dry ingredients into the batter (if you haven't done so already), switch to a spatula, and mix for 45 seconds to 1 minute. Almost all of the dry ingredients should be gone, but there should be a few left if you are choosing to add a mix-in. If not, mix the batter for another 5-10 seconds until the dry bits are gone, like the photo. I did not add mix-ins to this batch.
Mix-ins optional: Chocolate chips or nuts are always classic, but I like the addition of diced candied ginger. If you choose to add nuts, always toast your nuts! It brings out the natural oils and amplifies the flavor of the nuts. Fold the mix-ins into the batter until evenly distributed, about 10-15 seconds
Pour Batter and Bake!

-
Pour the batter into the prepared baking pan (make sure to scrape the bowl) and smooth out the top with a spatula.
-
Bake for 50-60 minutes, rotating the pan after 35 minutes of baking time. Once the loaf has been baking for 50 minutes, I would recommend checking if it is done by inserting a toothpick into the center. If it is clean when it comes out, the bread is ready! These moist breads can be a little tricky, so if you are at all unsure about the doneness of your loaf, I recommend baking for another 3-5 minutes.
Tip: If you have chocolate chips in your loaf, I would recommend checking the doneness of your loaf in a couple places, as the chocolate chips can interfere with the doneness check.
Cool and Slice (if not glazing)

-
When the loaf is done, take it out of the oven and let it cool in the pan for 10 minutes. Then, turn it out onto a cooling rack and let it cool for about 2 hours.
-
Once it is fully cooled and you have chosen not to put glaze on it, you are done! I would recommend cutting the loaf and keeping it in an airtight container for 4 days on the counter. The fridge is great for preserving things, but it will dry out your baked goods pretty quickly. If you do not think you will finish the loaf in time, you can put it in the freezer for up to 2 months. I prefer to slice this loaf into 16 pieces, for relatively thin slices. The bread holds up pretty well and gives you more slices to share! If you prefer thicker slices, you can slice into 12 slices.
Make the Glaze

- Combine all icing ingredients in a bowl and whisk until smooth. It will appear pretty thick, but still pourable. A thick icing works best for this recipe because it sticks better to the top and makes more dramatic drips on the sides of the loaf. If you prefer thinner glaze, you can add more liquid but it may run off the loaf.
Tip: Don't skip the cooling! It is important that this loaf is cool before glazing. Otherwise, the glaze will run right off or absorb into the loaf.
Optional: For a little extra holiday flair, I will add 15g Oat Milk and 15g Dairy-free Egg Nog for additional flavor without making the glaze too thick.
It's Time to Glaze!

- Drizzle the glaze over the top of the loaf with the whisk and spread it around with a spatula, keeping in mind that the glaze will likely pool in the middle because of the crack in the top. You will want to make sure there is glaze covering the entire top of the loaf. If you have extra glaze, you can add some extra glaze to the edges and encourage some drips on the side with your spatula.
Tip: Set up a glazing station with a piece of parchment under your cooling rack. The glaze may run off the loaf and setting this up makes cleanup easy!
Add Toppings: Optional
-
If you want, you can also top the freshly iced loaf with chopped candied ginger, chocolate chips, or chopped nuts. Make sure to add it while the glaze is still wet so it sticks. Let the glaze harden on the loaf before cutting for the cleanest cuts! This will usually take about 1 hour. If you can leave it longer, that is even better.
-
Similar storage instructions as above, but I would not recommend freezing it. The glaze will start to not look as clean and crisp, and the freezer may make it soggy when thawed. I love to make this recipe with the glaze for an event as a beautiful centerpiece. I would recommend consumption of this glazed loaf within 3 days. Slice and enjoy!