
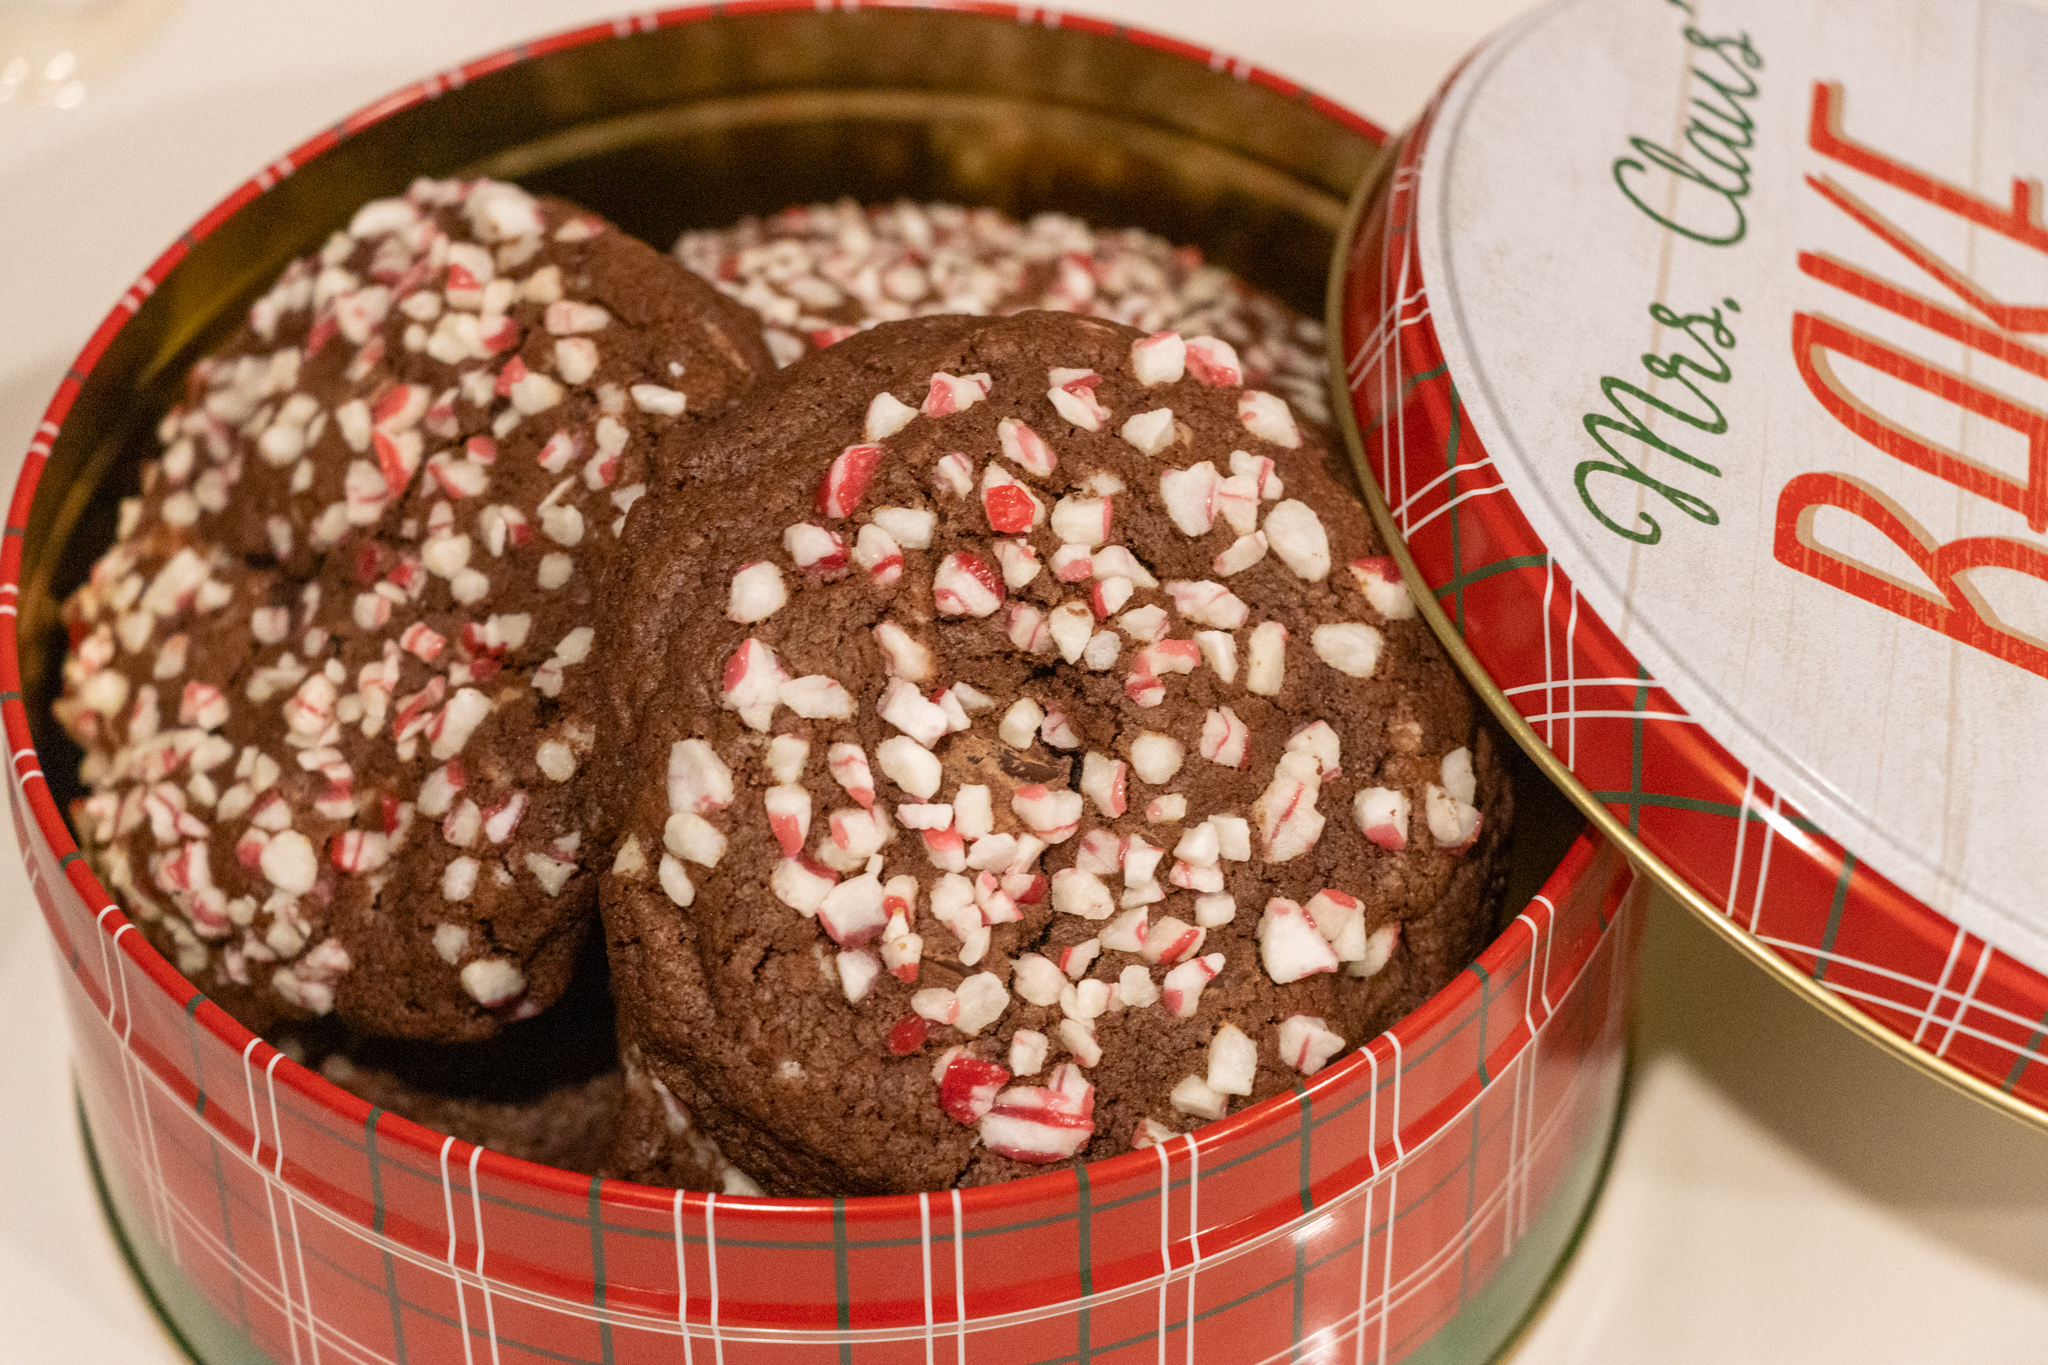
Chocolate Peppermint Cookies
I love making these cookies around the holidays because they just scream holiday cheer! While the recipe can take a bit of time with two major chilling moments, it is well worth it for the end result.
The base of this recipe uses brown butter, which is what I use for the foundation for all of my non-vegan cookies. Even though the brown butter flavor may not shine on its own, all the ingredients work with each other and bring out the best in one another.
You will notice that I provided both weight and volume measurements for most of these ingredients. I feel that weighing is better because it is more accurate. However, due the small quantities of some of these ingredients, it may be easier to measure by volume. The recipe can easily be cut in half, doubled, or tripled and the dough balls can be frozen for up to 2 months. I hope you give this recipe a try this holiday season!

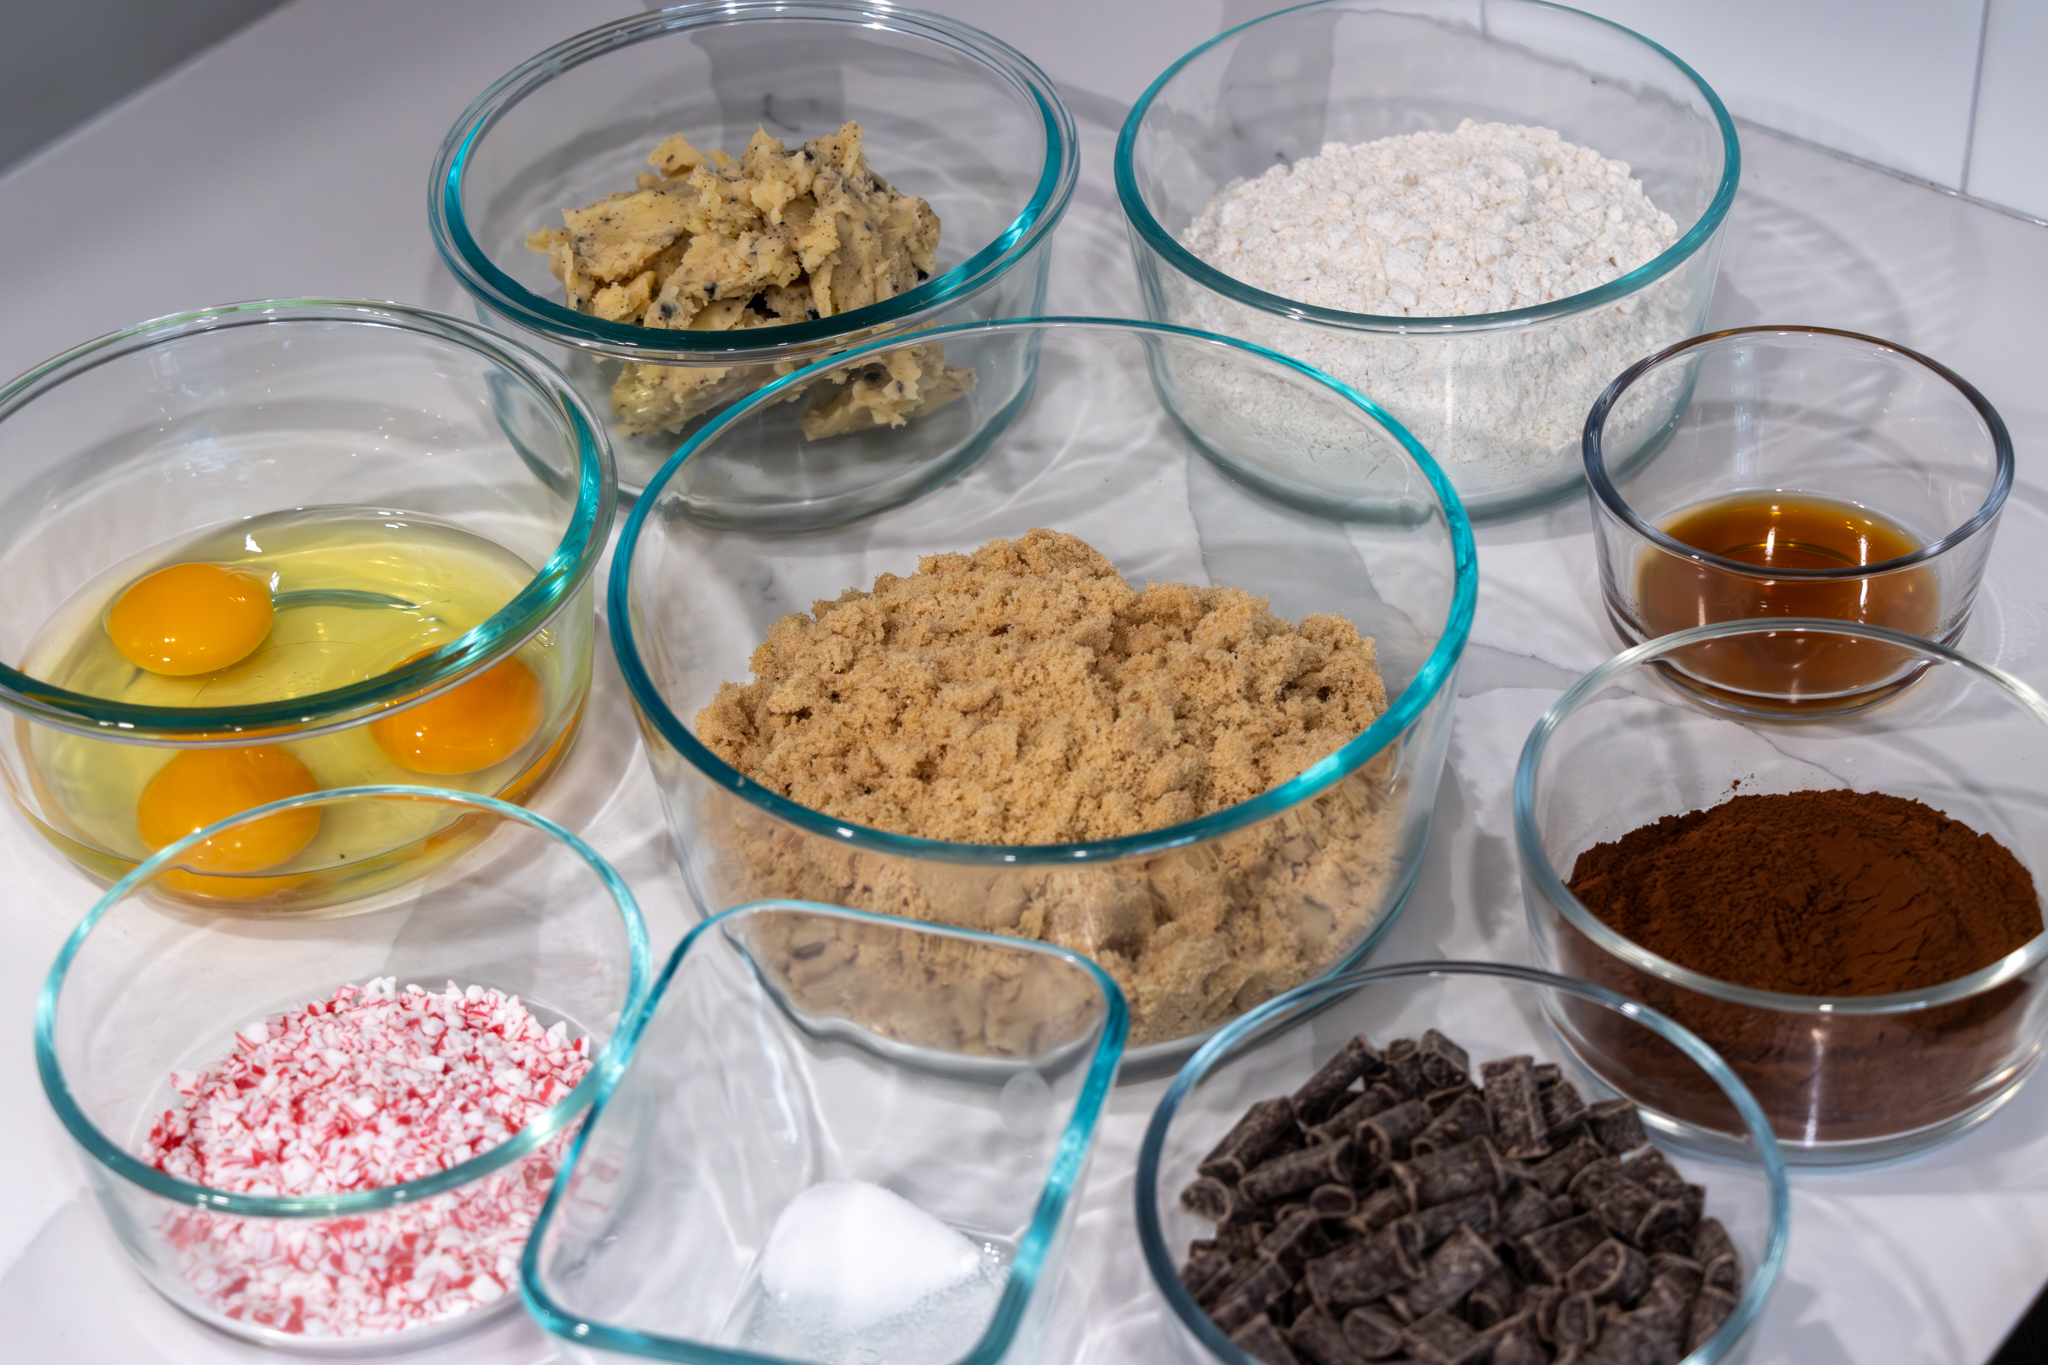
Ingredients
-
226g or 2 sticks of Unsalted Butter, to brown; approx. 175g after browning (see note)
-
300g Light Brown Sugar
-
155-160g or 3 Large Eggs, room temperature
-
3g or ¾ tsp Peppermint Extract
-
4g or 1 tsp Pure Vanilla Extract (see note)
-
260g GF All Purpose Flour (see note)
-
51g Unsweetened Dutch Processed Cocoa Powder - (see note)
-
3g or ½ tsp Baking Soda
-
2g or ½ tsp Fine Salt
-
90g Crushed Peppermint Candies, 55g for the dough and 35g for rolling
-
215g Chocolate Chunks - White, Semi Sweet, Milk, and/or Dark (see note)

Brown the Butter
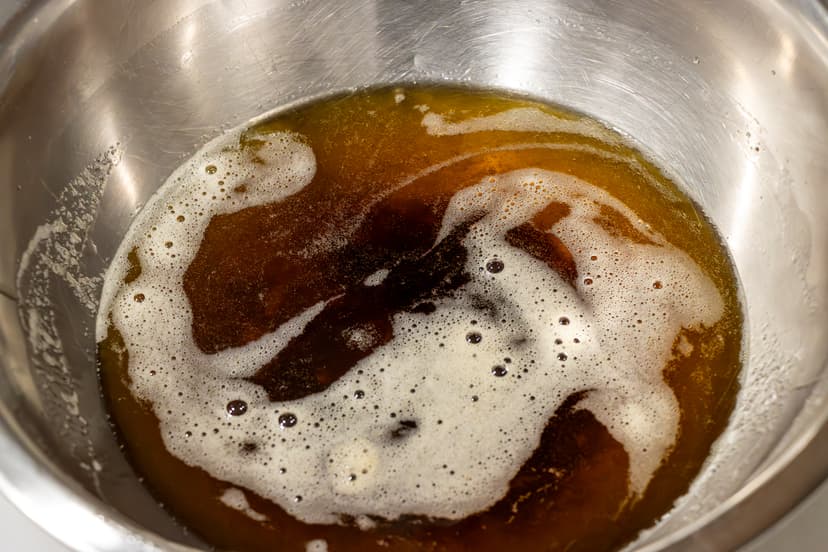
- Place the butter in a saucepan over medium heat until fully melted. Then, increase the heat slightly and let the butter simmer (not boil) for about 5-10 minutes, swirling the pan and stirring occasionally. As it cooks, the milk solids will begin to brown, sink to the bottom, and the butter will start to smell nutty. Another sign that the butter is browned enough is there will be a layer of foam on top and the little bubbles will stop popping as frequently (similar to when popcorn is done). Once the solids are golden brown, remove the pot from the burner to cool for about 2 minutes, then transfer the butter to a heat-safe container to cool completely at room temperature. As it cools, you can stir the butter to help encourage it to cool faster. When it is ready, it will feel like the consistency of softened butter, but it should still have some structure. This may take up to two hours.
Tip: Make the brown butter the day before and leave it on the counter to cool completely! Using the butter too soon will cause your cookies to spread too much and be crispy.

Creaming the Butter and Sugar
-
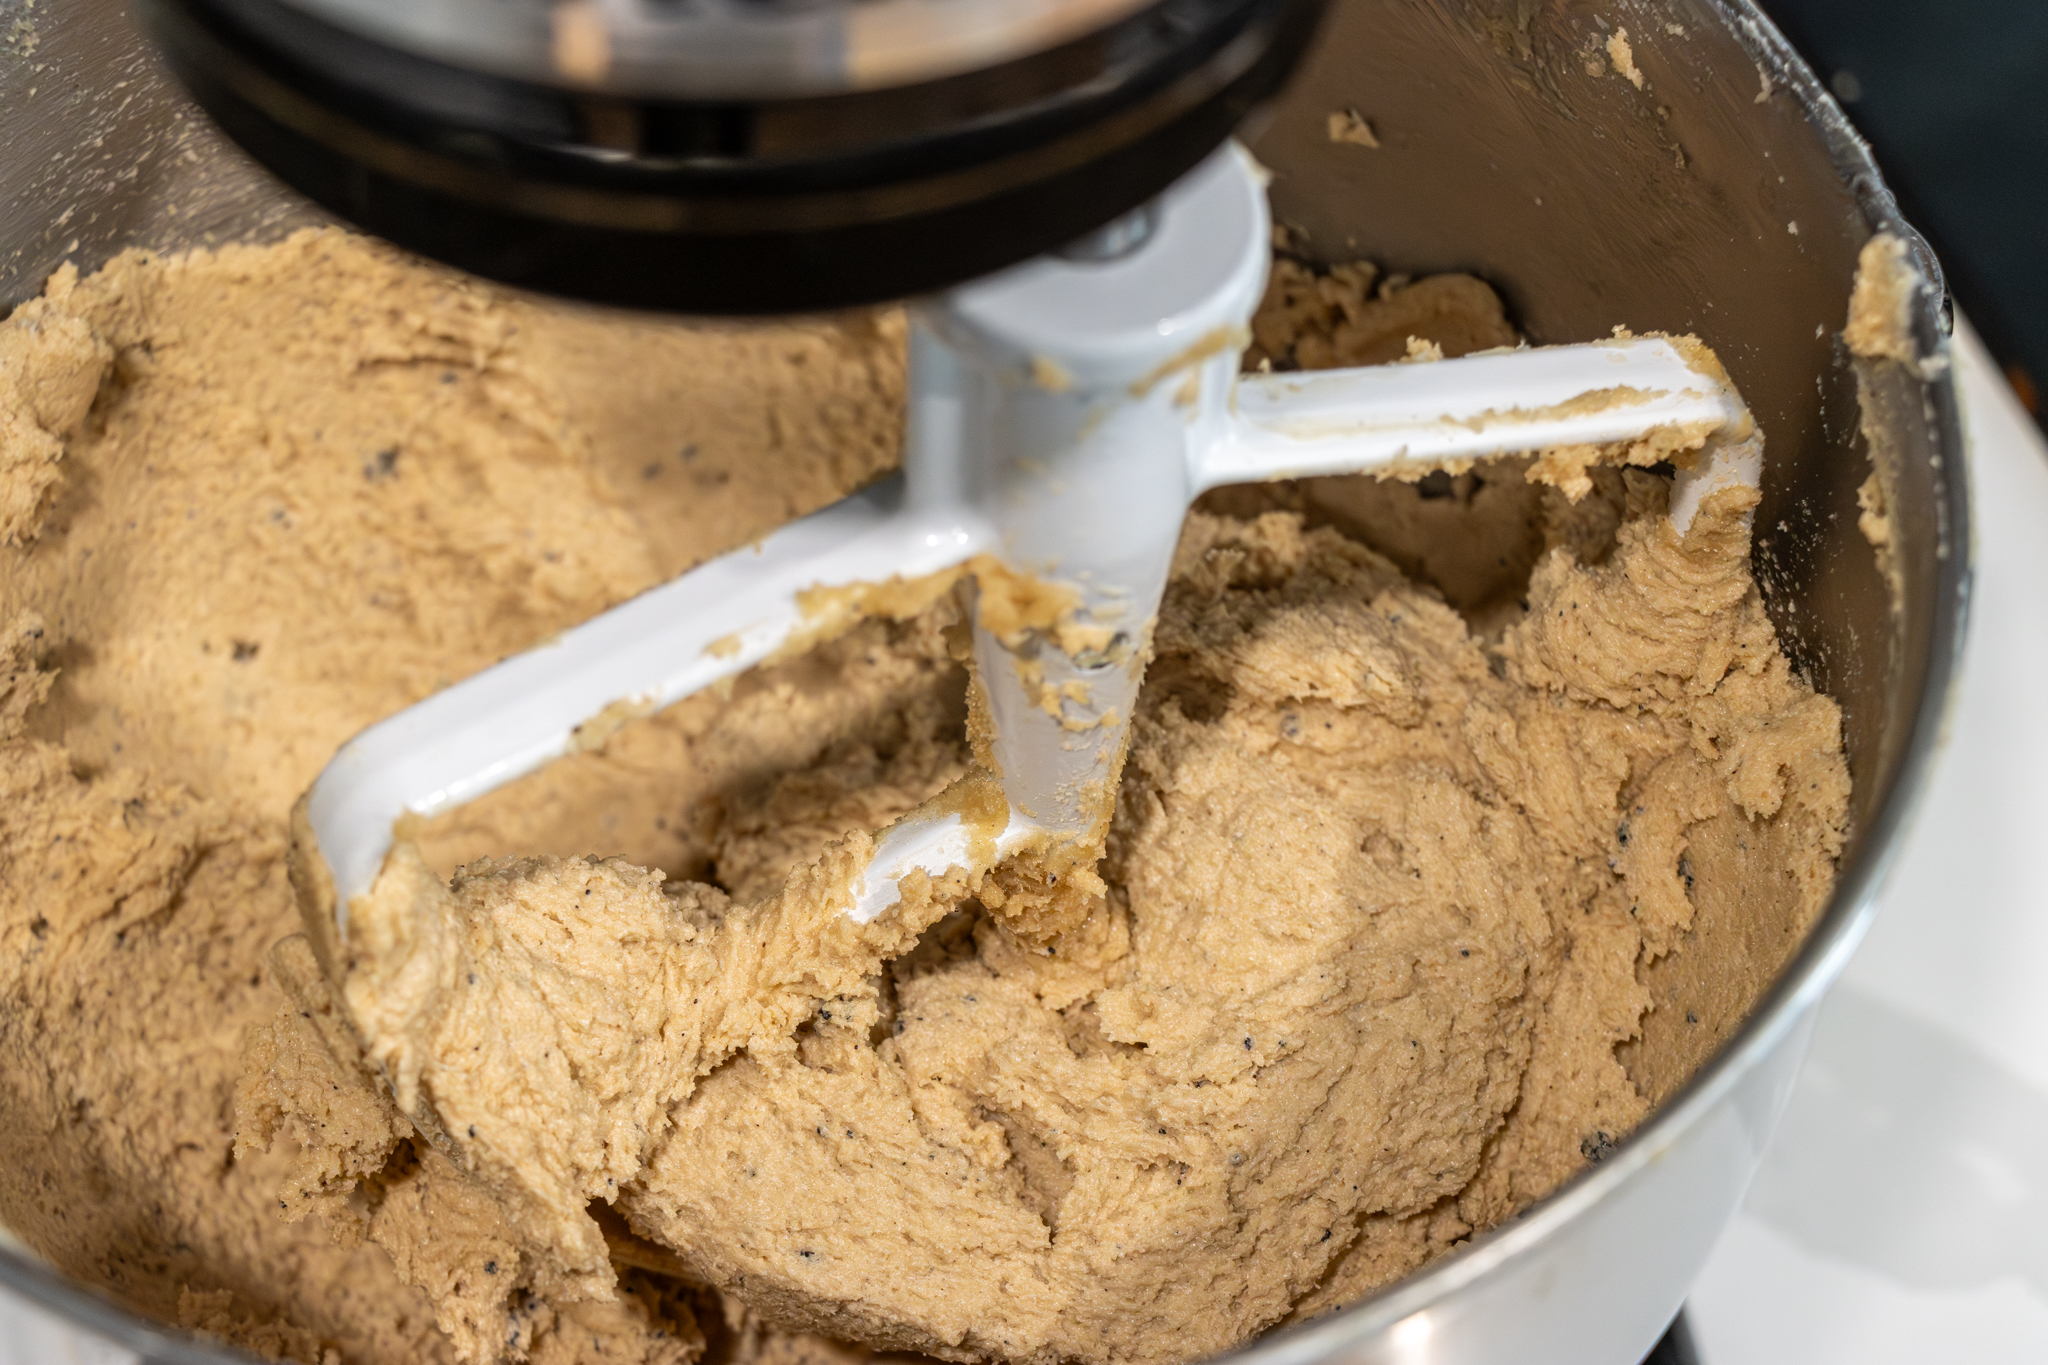
In the base of a stand mixer fitted with a paddle attachment, add the cooled (not cold) brown butter and light brown sugar. If the butter sat overnight and your house is a little chilly, the butter will be a little harder than we may want. Before adding the brown sugar to the mixer, beat the butter with the paddle for about 30 seconds to a minute until it is broken up and smooth.
-
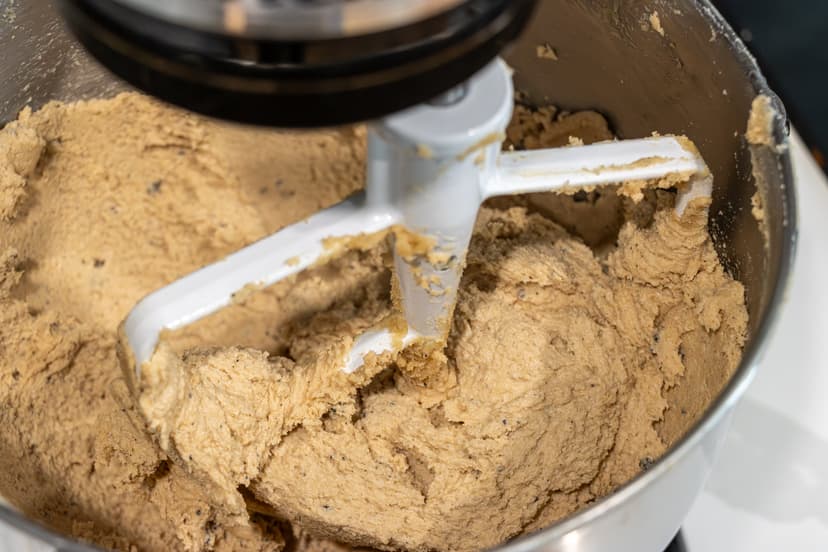
Turn the mixer on to “Stir” until mostly incorporated, about 30 seconds. It should resemble wet sand and start to pull away from the sides and bottom of the bowl.
-
Increase the speed on the mixer to speed 4-5 (medium speed) for 1 minute total, scraping down the bowl and paddle about halfway through. If you had colder butter to start, this process may take an extra 30 seconds or so. Mix until the mixture is creamy, but not airy.
Tip: I will say "scrape down the bowl and paddle" often in this recipe. I highly recommend you do it :)

Add the Eggs and Vanilla
- Add the room temperature eggs, one at a time! Make sure to scrape the bowl and paddle thoroughly after each addition. Wait to add the next egg until the last has been fully incorporated. I recommend starting to mix on “Stir”, but you can increase to speed 2-3 (slow speed) once the egg is broken up. Each egg addition will take between 30-45 seconds of mixing.
Tip: If you forget to take your eggs out early (which I do often), you can warm them up by putting them in a bowl with room temperature water for about 15 minutes. It is important that the eggs are room temperature or the cookie batter may split!
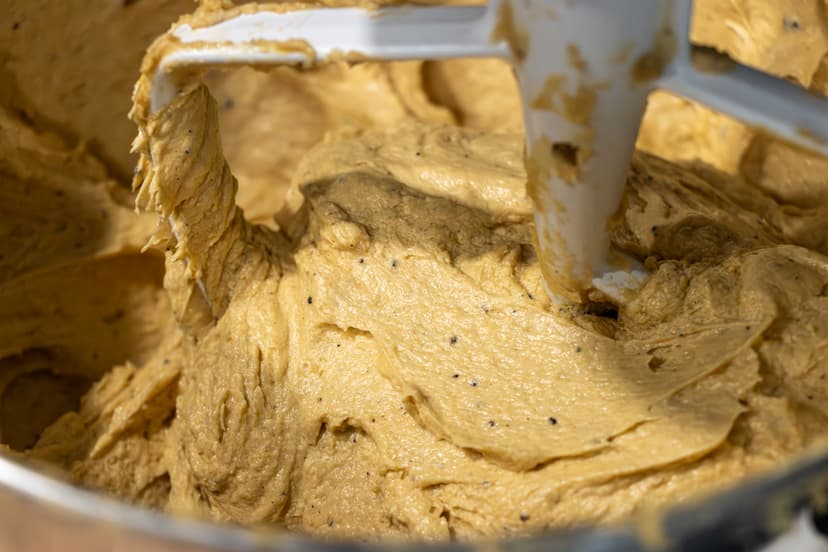
- After adding the last egg, add in the vanilla extract and peppermint extract, and mix until the last egg has fully incorporated into the dough. The mixture should look smooth and glossy once the last egg is fully incorporated. Scrape down the bowl and paddle and mix on speed 2-3 (slow speed) for 30 seconds. If the batter looks a little split, that is okay. Mix the dough on speed 4-5 (medium speed) for 15 seconds. Sometimes the dough needs a little encouragement to come together.
Tip: Even though this recipe calls for the flavor of peppermint, I will always include vanilla extract too. Vanilla brings out the flavor of any baked good, similar to salt. You are welcome to add less peppermint extract if you please. It's all about preference! These are pretty pepperminty, which I personally love.

Sift the Dry Ingredients and Add to Mixture
-
In a separate bowl, sift together the flour, cocoa powder, baking soda, and salt, and whisk together until evenly distributed. Sifting the dry ingredients will remove any clumps from the cocoa powder and baking soda.
-
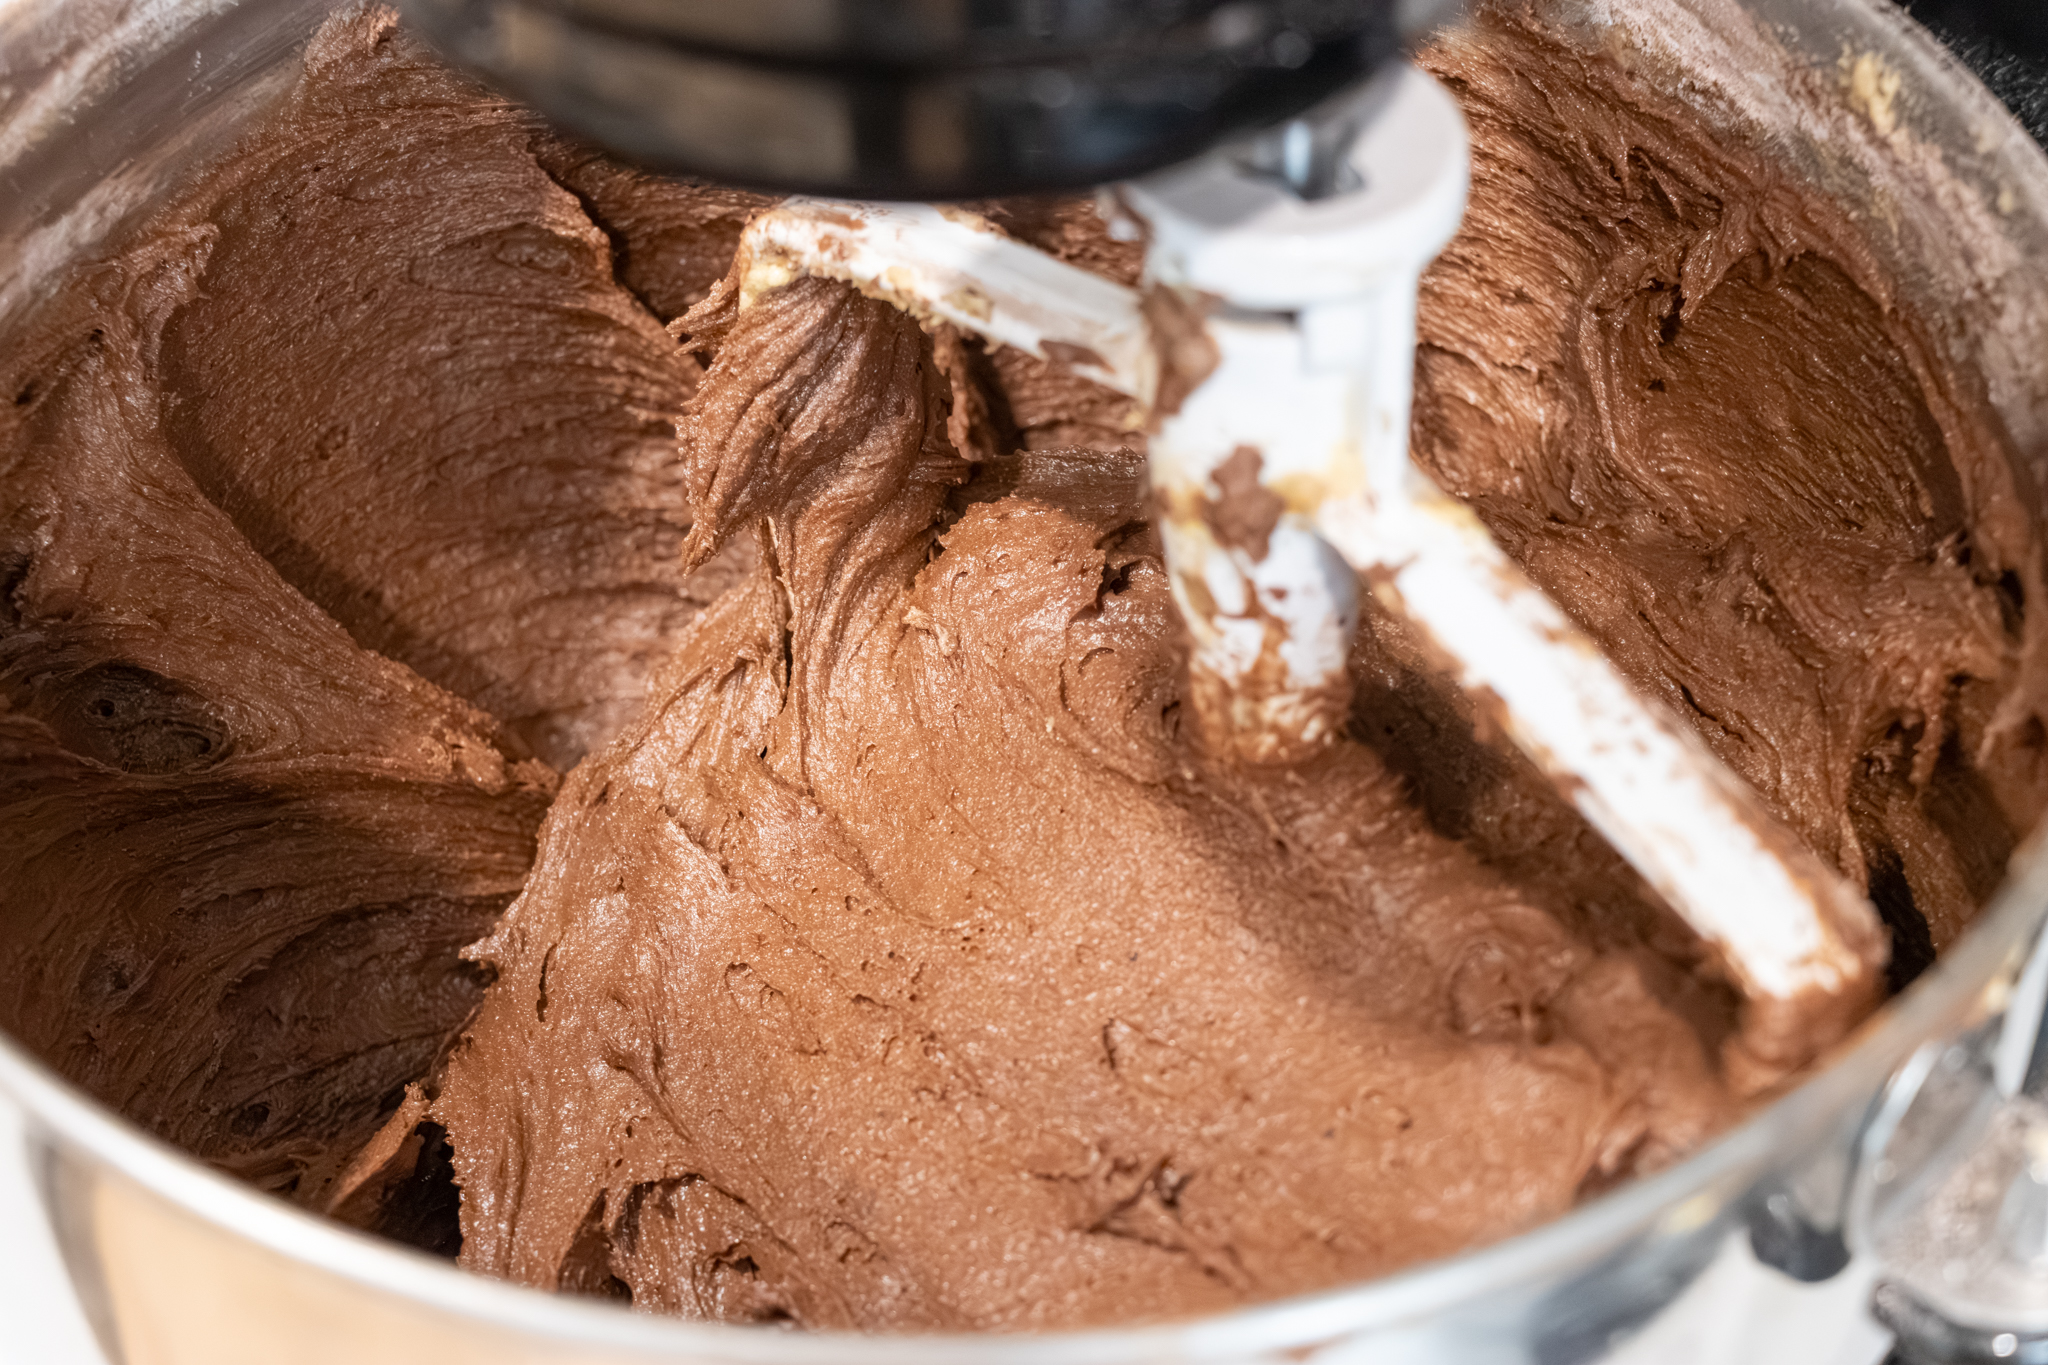
Add the dry ingredients to the wet dough mixture and turn the mixer on “Stir” for about 15-20 seconds. The dough will look pretty shaggy and still have lots of flour bits. Scrape down the bowl and paddle and turn the mixer back to “Stir” for another 15 seconds or just until all the flour is incorporated into the dough.
Tip: Whenever you are adding mix-ins to a recipe, it is best to stop the mixer just before the last of the flour is incorporated. Since you will be adding more to this recipe, you want to ensure it is not over-mixed or it will become tough.
Add Mix-ins and Chill
-
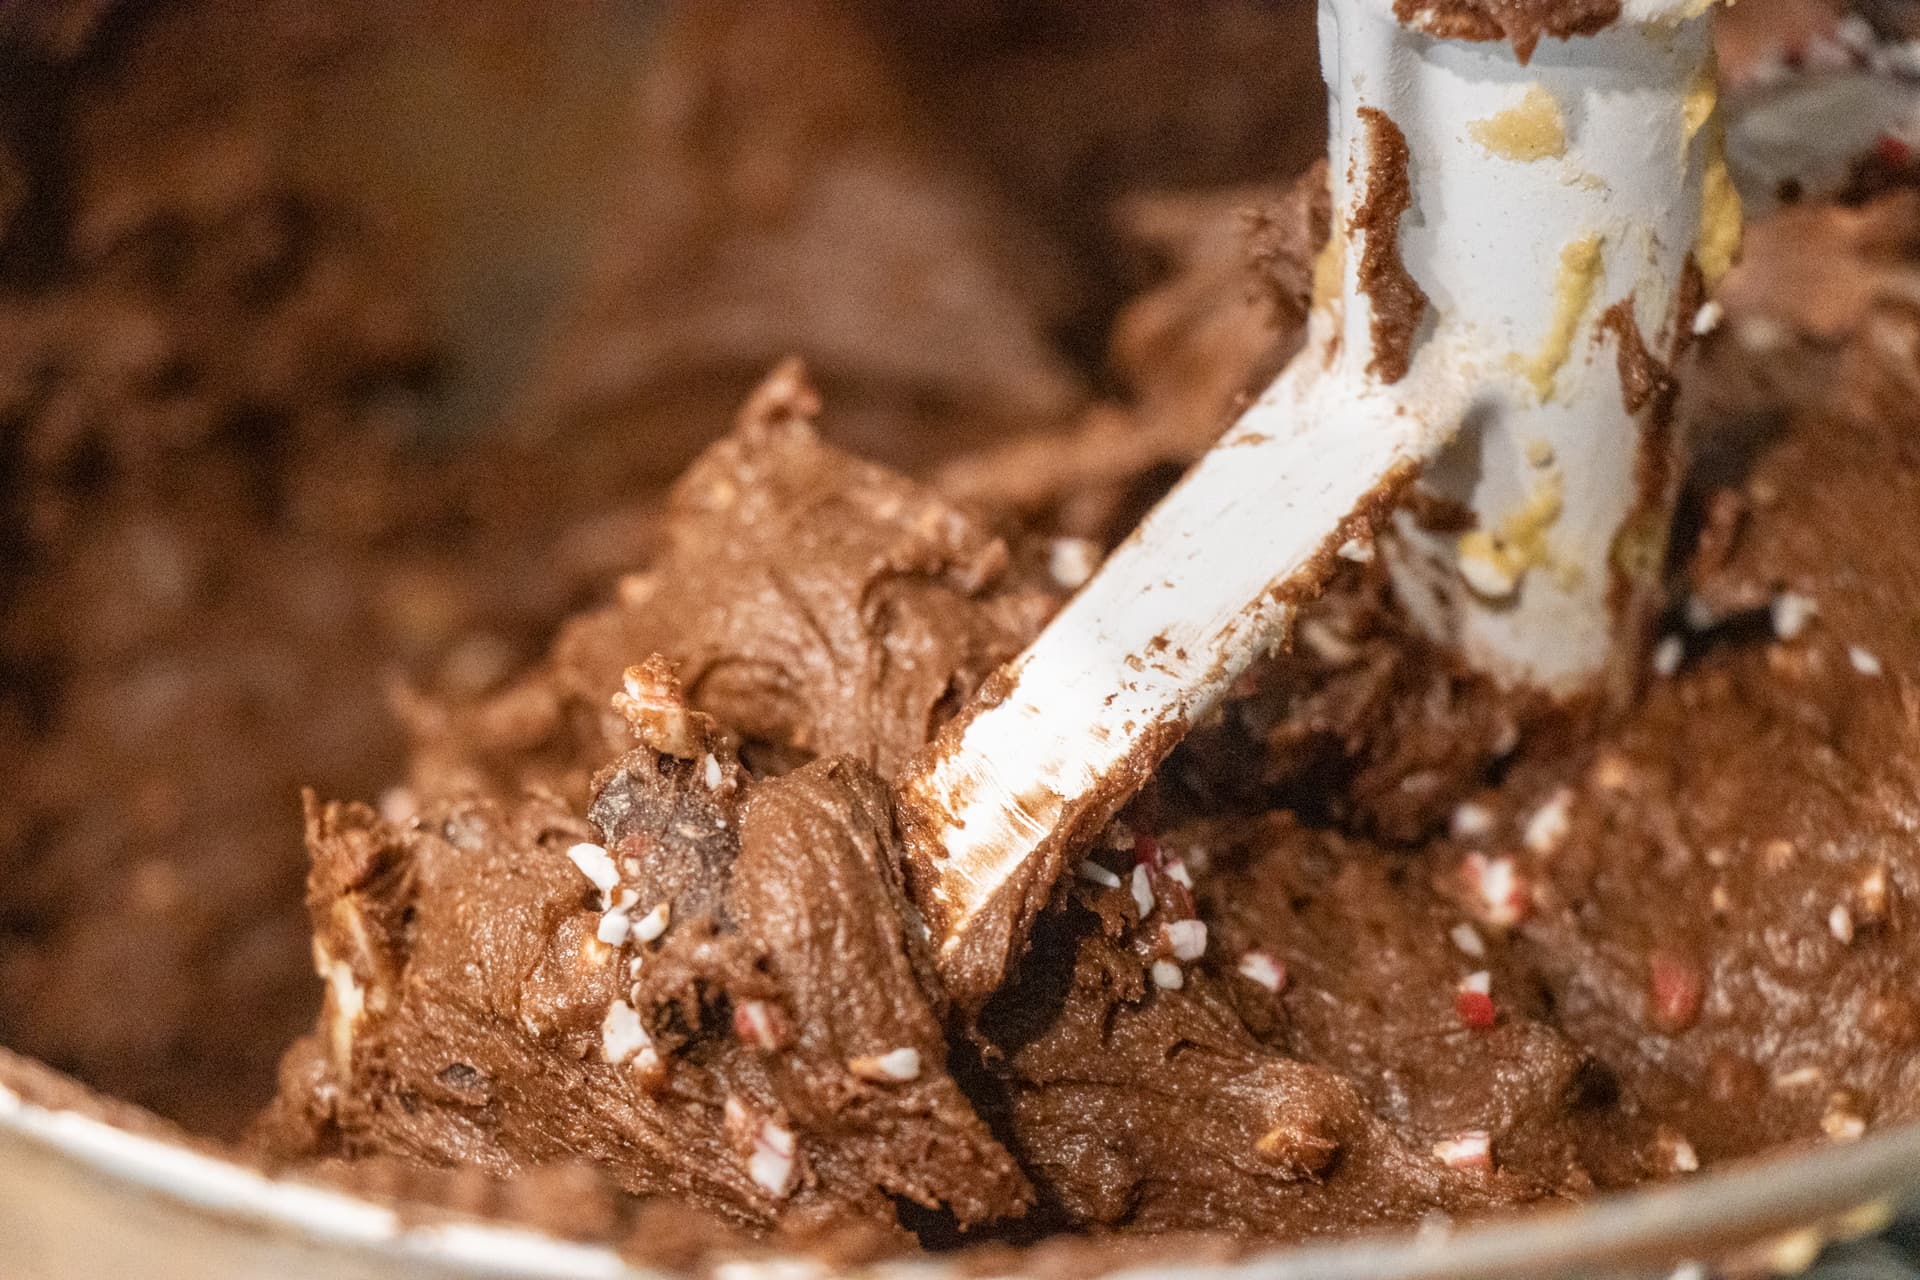
With the mixer on “Stir”, add 55g of crushed peppermint candies and the chocolate chunks, and mix for about 5-10 seconds. Turn the mixer off, take the bowl and paddle off the mixer and scrape everything, give the dough a couple turns with the spatula to make sure the goodies are evenly distributed.
-
The dough will be quite sticky and tacky, so the dough will need to be refrigerated for at least 2 hours (preferably 3 hours) before you can handle it. Cover the bowl with plastic wrap or transfer the dough to an airtight container and put in the fridge.
Tip: For the crushed peppermint candies, you can use any of your favorite candy canes or mints for this recipe. The ones that I use are specifically crushed peppermint candies made with all natural food dyes, so if you can find something like that, even better!
Tip: You can make this dough ahead of time! It is good in the fridge for up to two days. When you are ready to scoop them, take the chilled dough out of the fridge about 20 minutes before trying to handle it as it will likely be quite hard.
Roll the Cookies
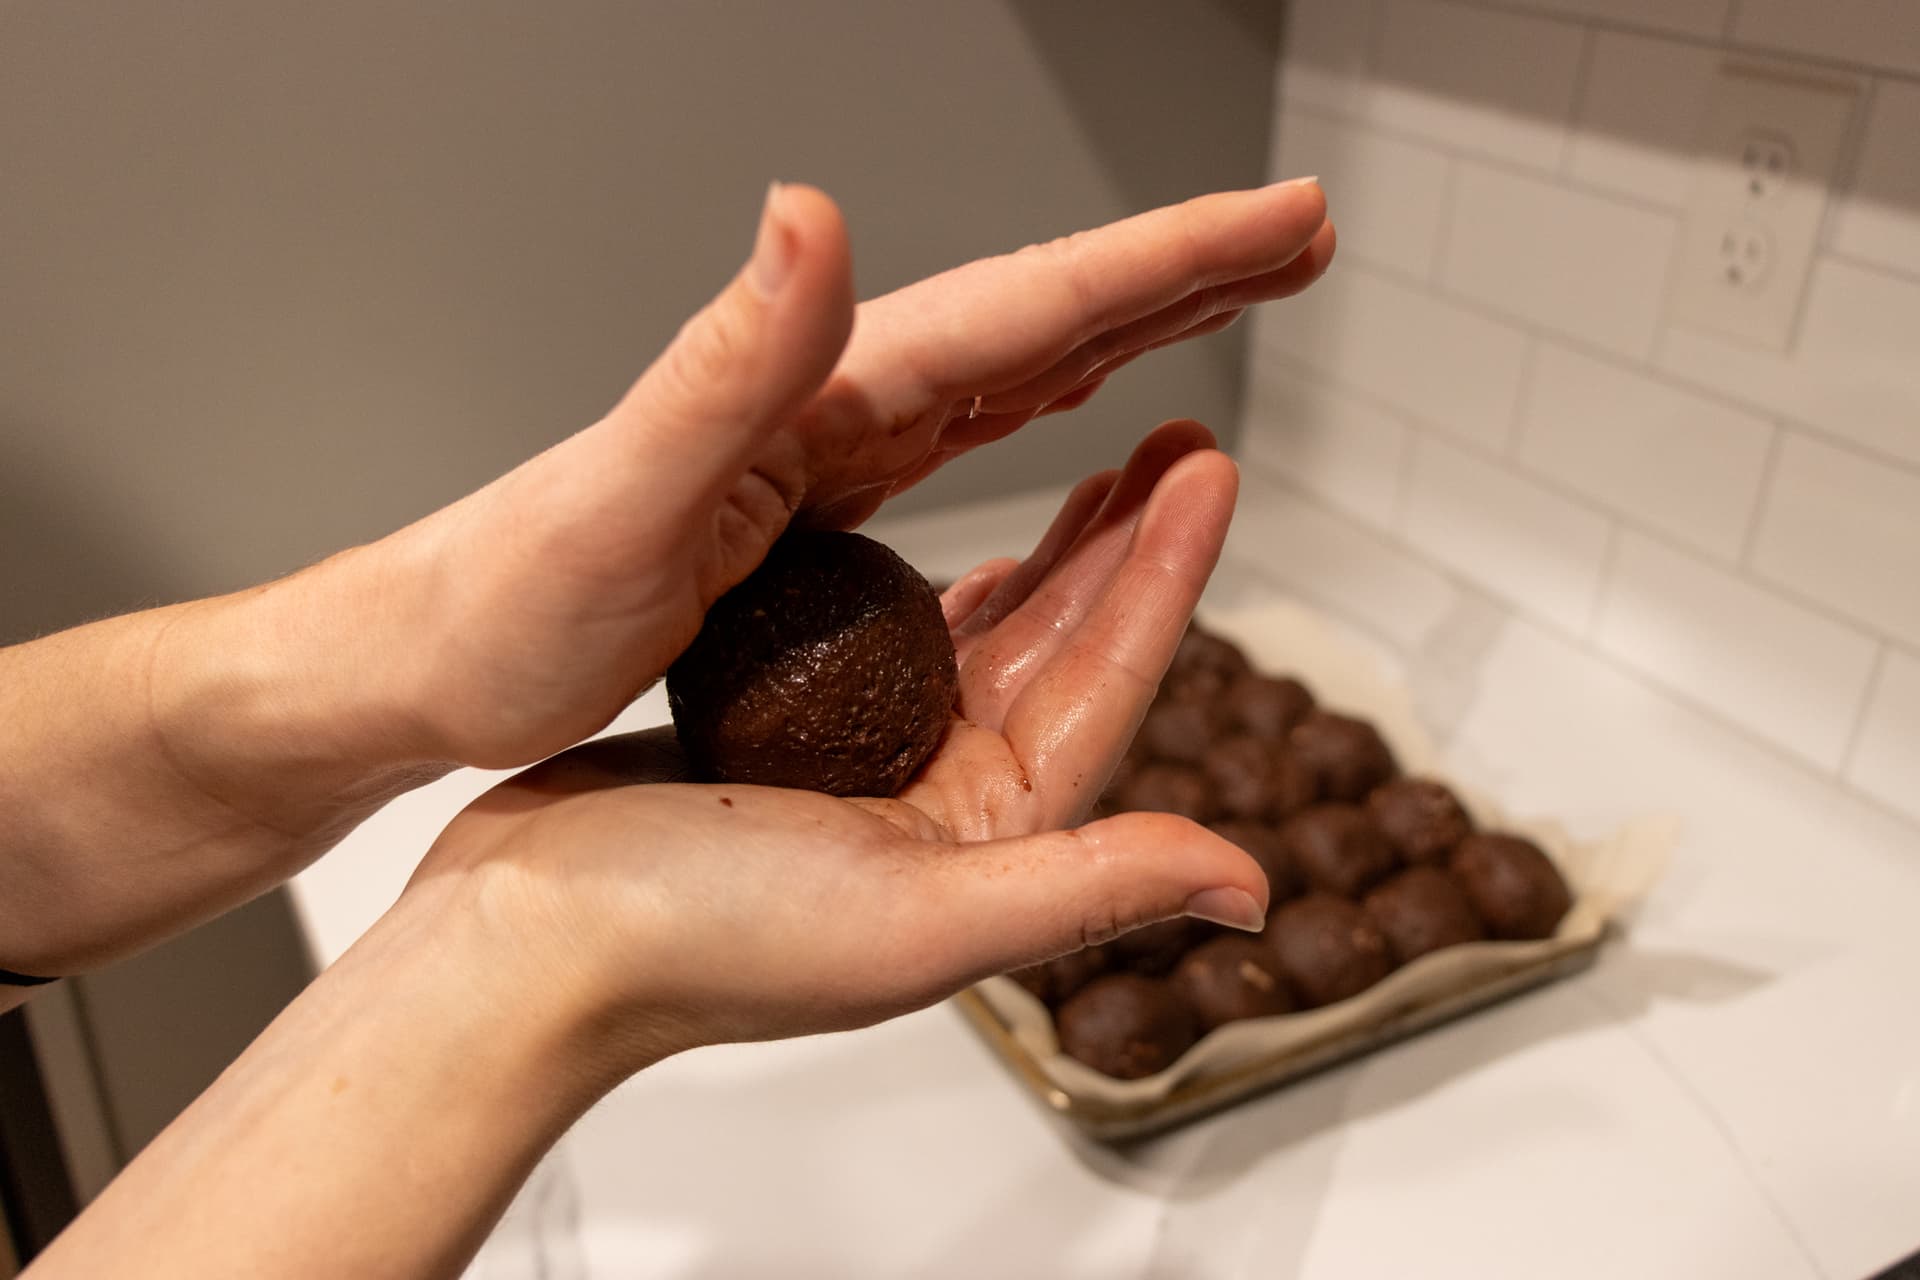
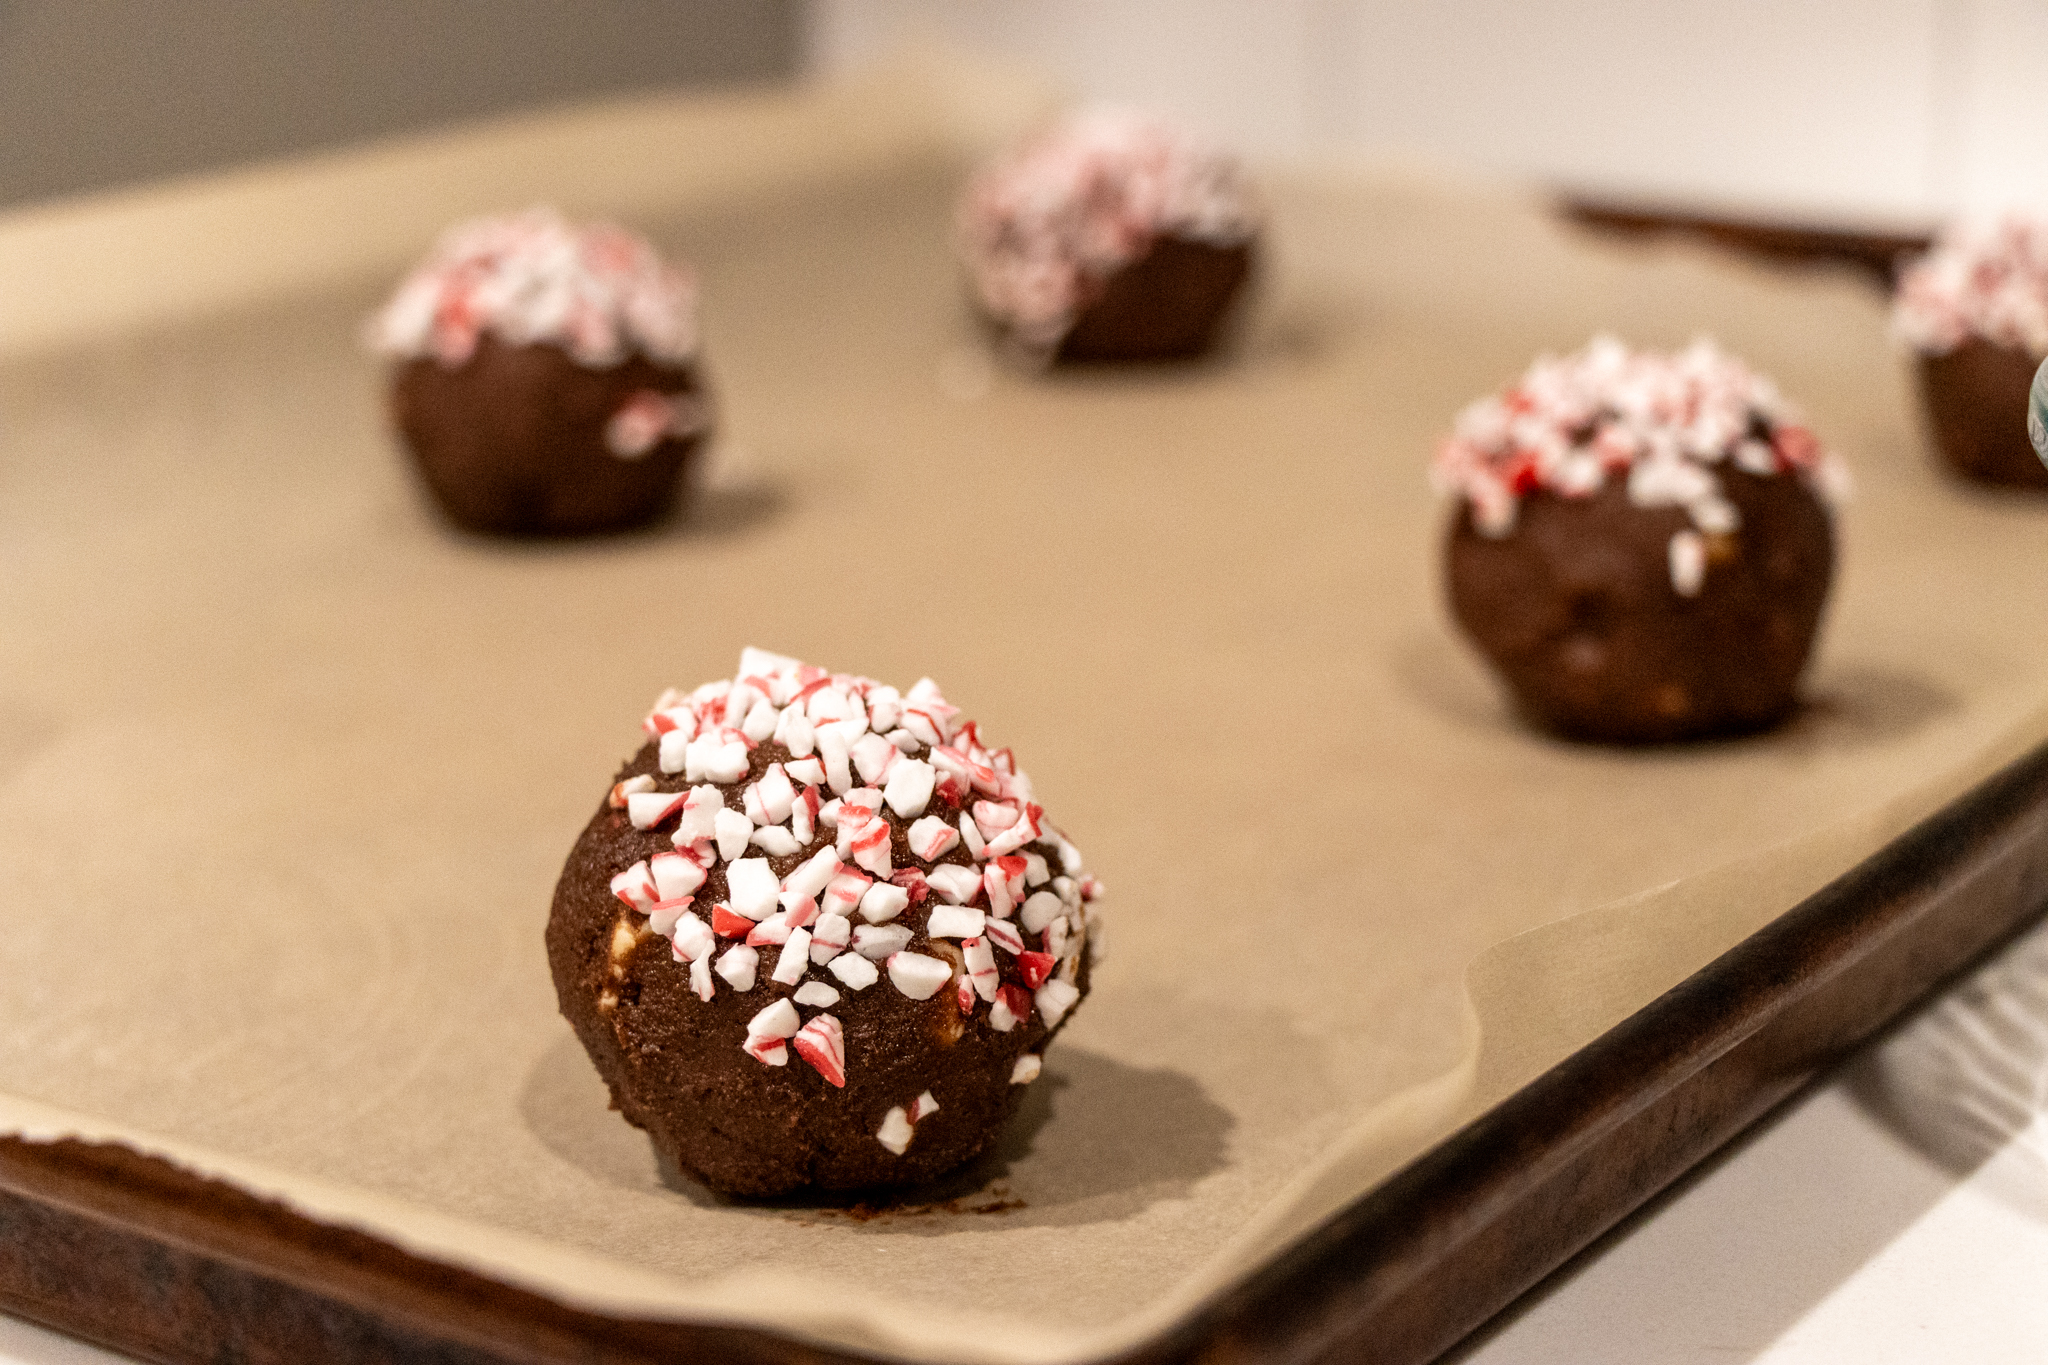
- After the chilling time is up, it's time to roll! Weigh each cookie to approximately 65 grams and roll into a ball. Place each finished cookie on a parchment-lined baking tray. The dough will stick to your hands a bit. About halfway through rolling the cookies, I suggest washing your hands and starting fresh!
Tip: The cookies in this recipe are 65 grams, but you are welcome to make them any size you desire. Just know that the baking time will increase or decrease with the cookie size.
Tip: You can bake the cookies right away or you can chill them or even freeze them! If you choose to bake right away, they will be a bit flatter and have crispier edges. If you choose to chill them longer, even overnight, they will be much taller and a bit softer on the inside.
Tip: If you choose to freeze the cookie dough balls, you can store them in the freezer for up to 2 months in an airtight container. You will want to increase the baking time by about 2 minutes if baking from frozen.

Bake and Enjoy!
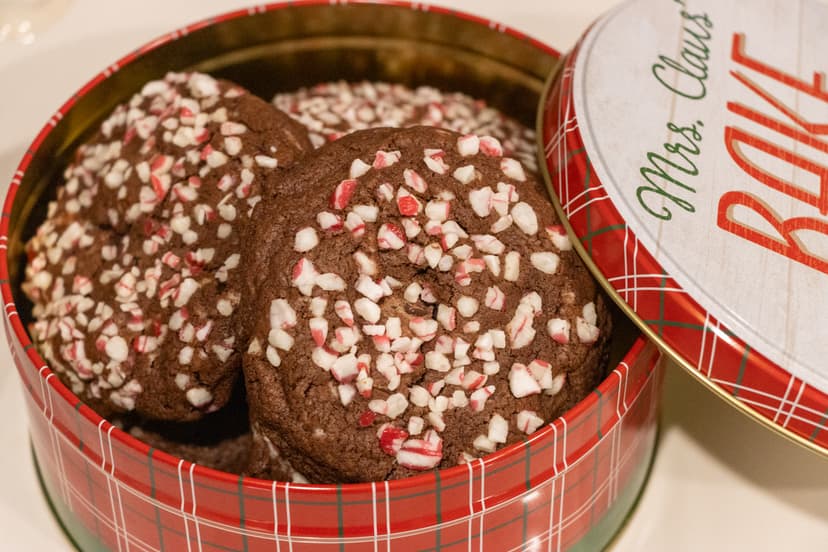
- Line a baking tray with parchment paper and turn the oven on to 350°F. Dip one side of the cookie dough balls in the remaining 35g of crushed peppermint candies and place them candy side up on the baking tray. You will want to give these cookies about 3 inches of space so they cook evenly, which is usually about 6 cookies per regular baking sheet.
Tip: Overcrowding your cookies on the pan will encourage them to spread into each other and become “friends”. We love friends, but we don't want our cookies to be friends.
- Bake at 350°F for 8 minutes. Then rotate the pan and bake again for approx. 6 minutes depending on your desired doneness. Every oven is different, so please be mindful that the cookies may take longer or a shorter time depending on your oven. When the cookies are done, they will be nicely mounded in the middle and the cookies will look mostly matte and no longer shiny on top.
Storage: Store the cookies in an airtight container at room temperature for 3-4 days. These also freeze well, so you can store them in the freezer for up to 1 month fully baked in an airtight container or freezer bag.
Chocolate Peppermint Cookies
I love making these cookies around the holidays because they just scream holiday cheer! While the recipe can take a bit of time with two major chilling moments, it is well worth it for the end result.
The base of this recipe uses brown butter, which is what I use for the foundation for all of my non-vegan cookies. Even though the brown butter flavor may not shine on its own, all the ingredients work with each other and bring out the best in one another.
You will notice that I provided both weight and volume measurements for most of these ingredients. I feel that weighing is better because it is more accurate. However, due the small quantities of some of these ingredients, it may be easier to measure by volume. The recipe can easily be cut in half, doubled, or tripled and the dough balls can be frozen for up to 2 months. I hope you give this recipe a try this holiday season!
Ingredients
-
226g or 2 sticks of Unsalted Butter, to brown; approx. 175g after browning (see note)
-
300g Light Brown Sugar
-
155-160g or 3 Large Eggs, room temperature
-
3g or ¾ tsp Peppermint Extract
-
4g or 1 tsp Pure Vanilla Extract (see note)
-
260g GF All Purpose Flour (see note)
-
51g Unsweetened Dutch Processed Cocoa Powder - (see note)
-
3g or ½ tsp Baking Soda
-
2g or ½ tsp Fine Salt
-
90g Crushed Peppermint Candies, 55g for the dough and 35g for rolling
-
215g Chocolate Chunks - White, Semi Sweet, Milk, and/or Dark (see note)

Brown the Butter
- Place the butter in a saucepan over medium heat until fully melted. Then, increase the heat slightly and let the butter simmer (not boil) for about 5-10 minutes, swirling the pan and stirring occasionally. As it cooks, the milk solids will begin to brown, sink to the bottom, and the butter will start to smell nutty. Another sign that the butter is browned enough is there will be a layer of foam on top and the little bubbles will stop popping as frequently (similar to when popcorn is done). Once the solids are golden brown, remove the pot from the burner to cool for about 2 minutes, then transfer the butter to a heat-safe container to cool completely at room temperature. As it cools, you can stir the butter to help encourage it to cool faster. When it is ready, it will feel like the consistency of softened butter, but it should still have some structure. This may take up to two hours.
Tip: Make the brown butter the day before and leave it on the counter to cool completely! Using the butter too soon will cause your cookies to spread too much and be crispy.
Creaming the Butter and Sugar
-
In the base of a stand mixer fitted with a paddle attachment, add the cooled (not cold) brown butter and light brown sugar. If the butter sat overnight and your house is a little chilly, the butter will be a little harder than we may want. Before adding the brown sugar to the mixer, beat the butter with the paddle for about 30 seconds to a minute until it is broken up and smooth.
-
Turn the mixer on to “Stir” until mostly incorporated, about 30 seconds. It should resemble wet sand and start to pull away from the sides and bottom of the bowl.
-
Increase the speed on the mixer to speed 4-5 (medium speed) for 1 minute total, scraping down the bowl and paddle about halfway through. If you had colder butter to start, this process may take an extra 30 seconds or so. Mix until the mixture is creamy, but not airy.
Tip: I will say "scrape down the bowl and paddle" often in this recipe. I highly recommend you do it :)
Add the Eggs and Vanilla
- Add the room temperature eggs, one at a time! Make sure to scrape the bowl and paddle thoroughly after each addition. Wait to add the next egg until the last has been fully incorporated. I recommend starting to mix on “Stir”, but you can increase to speed 2-3 (slow speed) once the egg is broken up. Each egg addition will take between 30-45 seconds of mixing.
Tip: If you forget to take your eggs out early (which I do often), you can warm them up by putting them in a bowl with room temperature water for about 15 minutes. It is important that the eggs are room temperature or the cookie batter may split!
- After adding the last egg, add in the vanilla extract and peppermint extract, and mix until the last egg has fully incorporated into the dough. The mixture should look smooth and glossy once the last egg is fully incorporated. Scrape down the bowl and paddle and mix on speed 2-3 (slow speed) for 30 seconds. If the batter looks a little split, that is okay. Mix the dough on speed 4-5 (medium speed) for 15 seconds. Sometimes the dough needs a little encouragement to come together.
Tip: Even though this recipe calls for the flavor of peppermint, I will always include vanilla extract too. Vanilla brings out the flavor of any baked good, similar to salt. You are welcome to add less peppermint extract if you please. It's all about preference! These are pretty pepperminty, which I personally love.
Sift the Dry Ingredients and Add to Mixture
-
In a separate bowl, sift together the flour, cocoa powder, baking soda, and salt, and whisk together until evenly distributed. Sifting the dry ingredients will remove any clumps from the cocoa powder and baking soda.
-
Add the dry ingredients to the wet dough mixture and turn the mixer on “Stir” for about 15-20 seconds. The dough will look pretty shaggy and still have lots of flour bits. Scrape down the bowl and paddle and turn the mixer back to “Stir” for another 15 seconds or just until all the flour is incorporated into the dough.
Tip: Whenever you are adding mix-ins to a recipe, it is best to stop the mixer just before the last of the flour is incorporated. Since you will be adding more to this recipe, you want to ensure it is not over-mixed or it will become tough.

Add Mix-ins and Chill
-
With the mixer on “Stir”, add 55g of crushed peppermint candies and the chocolate chunks, and mix for about 5-10 seconds. Turn the mixer off, take the bowl and paddle off the mixer and scrape everything, give the dough a couple turns with the spatula to make sure the goodies are evenly distributed.
-
The dough will be quite sticky and tacky, so the dough will need to be refrigerated for at least 2 hours (preferably 3 hours) before you can handle it. Cover the bowl with plastic wrap or transfer the dough to an airtight container and put in the fridge.
Tip: For the crushed peppermint candies, you can use any of your favorite candy canes or mints for this recipe. The ones that I use are specifically crushed peppermint candies made with all natural food dyes, so if you can find something like that, even better!
Tip: You can make this dough ahead of time! It is good in the fridge for up to two days. When you are ready to scoop them, take the chilled dough out of the fridge about 20 minutes before trying to handle it as it will likely be quite hard.

Roll the Cookies
- After the chilling time is up, it's time to roll! Weigh each cookie to approximately 65 grams and roll into a ball. Place each finished cookie on a parchment-lined baking tray. The dough will stick to your hands a bit. About halfway through rolling the cookies, I suggest washing your hands and starting fresh!
Tip: The cookies in this recipe are 65 grams, but you are welcome to make them any size you desire. Just know that the baking time will increase or decrease with the cookie size.
Tip: You can bake the cookies right away or you can chill them or even freeze them! If you choose to bake right away, they will be a bit flatter and have crispier edges. If you choose to chill them longer, even overnight, they will be much taller and a bit softer on the inside.
Tip: If you choose to freeze the cookie dough balls, you can store them in the freezer for up to 2 months in an airtight container. You will want to increase the baking time by about 2 minutes if baking from frozen.

Bake and Enjoy!
- Line a baking tray with parchment paper and turn the oven on to 350°F. Dip one side of the cookie dough balls in the remaining 35g of crushed peppermint candies and place them candy side up on the baking tray. You will want to give these cookies about 3 inches of space so they cook evenly, which is usually about 6 cookies per regular baking sheet.
Tip: Overcrowding your cookies on the pan will encourage them to spread into each other and become “friends”. We love friends, but we don't want our cookies to be friends.
- Bake at 350°F for 8 minutes. Then rotate the pan and bake again for approx. 6 minutes depending on your desired doneness. Every oven is different, so please be mindful that the cookies may take longer or a shorter time depending on your oven. When the cookies are done, they will be nicely mounded in the middle and the cookies will look mostly matte and no longer shiny on top.
Storage: Store the cookies in an airtight container at room temperature for 3-4 days. These also freeze well, so you can store them in the freezer for up to 1 month fully baked in an airtight container or freezer bag.

Chocolate Peppermint Cookies
I love making these cookies around the holidays because they just scream holiday cheer! While the recipe can take a bit of time with two major chilling moments, it is well worth it for the end result.
The base of this recipe uses brown butter, which is what I use for the foundation for all of my non-vegan cookies. Even though the brown butter flavor may not shine on its own, all the ingredients work with each other and bring out the best in one another.
You will notice that I provided both weight and volume measurements for most of these ingredients. I feel that weighing is better because it is more accurate. However, due the small quantities of some of these ingredients, it may be easier to measure by volume. The recipe can easily be cut in half, doubled, or tripled and the dough balls can be frozen for up to 2 months. I hope you give this recipe a try this holiday season!
Ingredients
-
226g or 2 sticks of Unsalted Butter, to brown; approx. 175g after browning (see note)
-
300g Light Brown Sugar
-
155-160g or 3 Large Eggs, room temperature
-
3g or ¾ tsp Peppermint Extract
-
4g or 1 tsp Pure Vanilla Extract (see note)
-
260g GF All Purpose Flour (see note)
-
51g Unsweetened Dutch Processed Cocoa Powder - (see note)
-
3g or ½ tsp Baking Soda
-
2g or ½ tsp Fine Salt
-
90g Crushed Peppermint Candies, 55g for the dough and 35g for rolling
-
215g Chocolate Chunks - White, Semi Sweet, Milk, and/or Dark (see note)
Brown the Butter

- Place the butter in a saucepan over medium heat until fully melted. Then, increase the heat slightly and let the butter simmer (not boil) for about 5-10 minutes, swirling the pan and stirring occasionally. As it cooks, the milk solids will begin to brown, sink to the bottom, and the butter will start to smell nutty. Another sign that the butter is browned enough is there will be a layer of foam on top and the little bubbles will stop popping as frequently (similar to when popcorn is done). Once the solids are golden brown, remove the pot from the burner to cool for about 2 minutes, then transfer the butter to a heat-safe container to cool completely at room temperature. As it cools, you can stir the butter to help encourage it to cool faster. When it is ready, it will feel like the consistency of softened butter, but it should still have some structure. This may take up to two hours.
Tip: Make the brown butter the day before and leave it on the counter to cool completely! Using the butter too soon will cause your cookies to spread too much and be crispy.
Creaming the Butter and Sugar
-
In the base of a stand mixer fitted with a paddle attachment, add the cooled (not cold) brown butter and light brown sugar. If the butter sat overnight and your house is a little chilly, the butter will be a little harder than we may want. Before adding the brown sugar to the mixer, beat the butter with the paddle for about 30 seconds to a minute until it is broken up and smooth.
-
Turn the mixer on to “Stir” until mostly incorporated, about 30 seconds. It should resemble wet sand and start to pull away from the sides and bottom of the bowl.
-
Increase the speed on the mixer to speed 4-5 (medium speed) for 1 minute total, scraping down the bowl and paddle about halfway through. If you had colder butter to start, this process may take an extra 30 seconds or so. Mix until the mixture is creamy, but not airy.
Tip: I will say "scrape down the bowl and paddle" often in this recipe. I highly recommend you do it :)
Add the Eggs and Vanilla

- Add the room temperature eggs, one at a time! Make sure to scrape the bowl and paddle thoroughly after each addition. Wait to add the next egg until the last has been fully incorporated. I recommend starting to mix on “Stir”, but you can increase to speed 2-3 (slow speed) once the egg is broken up. Each egg addition will take between 30-45 seconds of mixing.
Tip: If you forget to take your eggs out early (which I do often), you can warm them up by putting them in a bowl with room temperature water for about 15 minutes. It is important that the eggs are room temperature or the cookie batter may split!
- After adding the last egg, add in the vanilla extract and peppermint extract, and mix until the last egg has fully incorporated into the dough. The mixture should look smooth and glossy once the last egg is fully incorporated. Scrape down the bowl and paddle and mix on speed 2-3 (slow speed) for 30 seconds. If the batter looks a little split, that is okay. Mix the dough on speed 4-5 (medium speed) for 15 seconds. Sometimes the dough needs a little encouragement to come together.
Tip: Even though this recipe calls for the flavor of peppermint, I will always include vanilla extract too. Vanilla brings out the flavor of any baked good, similar to salt. You are welcome to add less peppermint extract if you please. It's all about preference! These are pretty pepperminty, which I personally love.
Sift the Dry Ingredients and Add to Mixture
-
In a separate bowl, sift together the flour, cocoa powder, baking soda, and salt, and whisk together until evenly distributed. Sifting the dry ingredients will remove any clumps from the cocoa powder and baking soda.
-
Add the dry ingredients to the wet dough mixture and turn the mixer on “Stir” for about 15-20 seconds. The dough will look pretty shaggy and still have lots of flour bits. Scrape down the bowl and paddle and turn the mixer back to “Stir” for another 15 seconds or just until all the flour is incorporated into the dough.
Tip: Whenever you are adding mix-ins to a recipe, it is best to stop the mixer just before the last of the flour is incorporated. Since you will be adding more to this recipe, you want to ensure it is not over-mixed or it will become tough.
Add Mix-ins and Chill

-
With the mixer on “Stir”, add 55g of crushed peppermint candies and the chocolate chunks, and mix for about 5-10 seconds. Turn the mixer off, take the bowl and paddle off the mixer and scrape everything, give the dough a couple turns with the spatula to make sure the goodies are evenly distributed.
-
The dough will be quite sticky and tacky, so the dough will need to be refrigerated for at least 2 hours (preferably 3 hours) before you can handle it. Cover the bowl with plastic wrap or transfer the dough to an airtight container and put in the fridge.
Tip: For the crushed peppermint candies, you can use any of your favorite candy canes or mints for this recipe. The ones that I use are specifically crushed peppermint candies made with all natural food dyes, so if you can find something like that, even better!
Tip: You can make this dough ahead of time! It is good in the fridge for up to two days. When you are ready to scoop them, take the chilled dough out of the fridge about 20 minutes before trying to handle it as it will likely be quite hard.
Roll the Cookies

- After the chilling time is up, it's time to roll! Weigh each cookie to approximately 65 grams and roll into a ball. Place each finished cookie on a parchment-lined baking tray. The dough will stick to your hands a bit. About halfway through rolling the cookies, I suggest washing your hands and starting fresh!
Tip: The cookies in this recipe are 65 grams, but you are welcome to make them any size you desire. Just know that the baking time will increase or decrease with the cookie size.
Tip: You can bake the cookies right away or you can chill them or even freeze them! If you choose to bake right away, they will be a bit flatter and have crispier edges. If you choose to chill them longer, even overnight, they will be much taller and a bit softer on the inside.
Tip: If you choose to freeze the cookie dough balls, you can store them in the freezer for up to 2 months in an airtight container. You will want to increase the baking time by about 2 minutes if baking from frozen.
Bake and Enjoy!
- Line a baking tray with parchment paper and turn the oven on to 350°F. Dip one side of the cookie dough balls in the remaining 35g of crushed peppermint candies and place them candy side up on the baking tray. You will want to give these cookies about 3 inches of space so they cook evenly, which is usually about 6 cookies per regular baking sheet.
Tip: Overcrowding your cookies on the pan will encourage them to spread into each other and become “friends”. We love friends, but we don't want our cookies to be friends.
- Bake at 350°F for 8 minutes. Then rotate the pan and bake again for approx. 6 minutes depending on your desired doneness. Every oven is different, so please be mindful that the cookies may take longer or a shorter time depending on your oven. When the cookies are done, they will be nicely mounded in the middle and the cookies will look mostly matte and no longer shiny on top.
Storage: Store the cookies in an airtight container at room temperature for 3-4 days. These also freeze well, so you can store them in the freezer for up to 1 month fully baked in an airtight container or freezer bag.